Supported Spaces
Articles
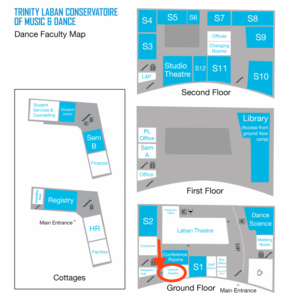
Laban Building
The Laban Building is sometimes known as the Marion North building.
Studios
The Creative Technology Services team support all the studios within the Laban Building.
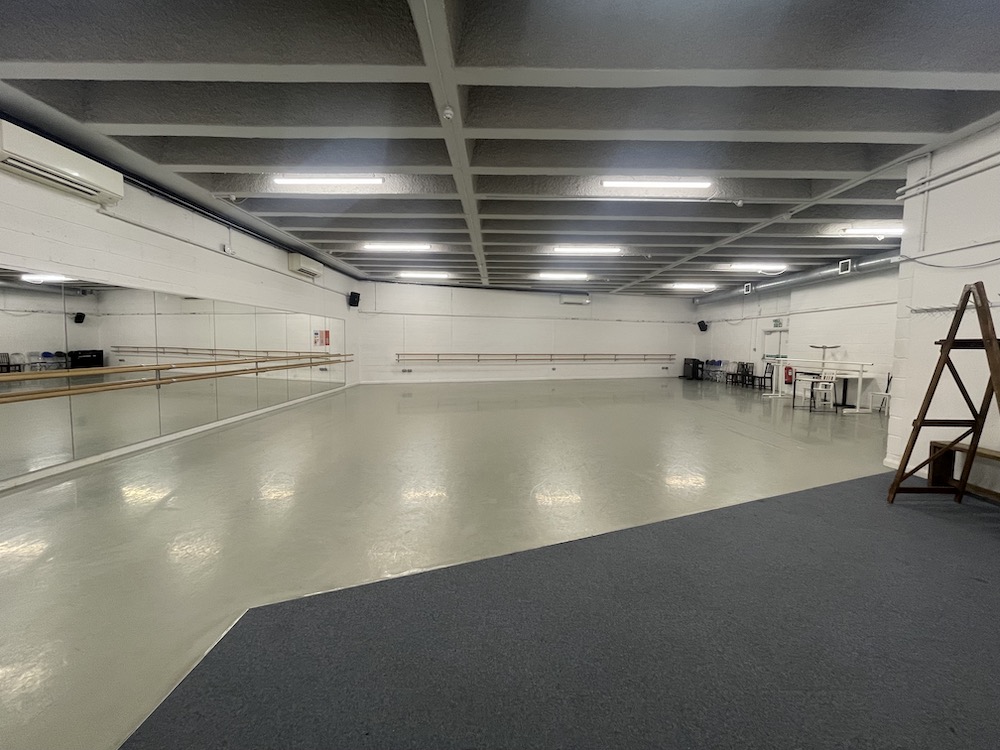
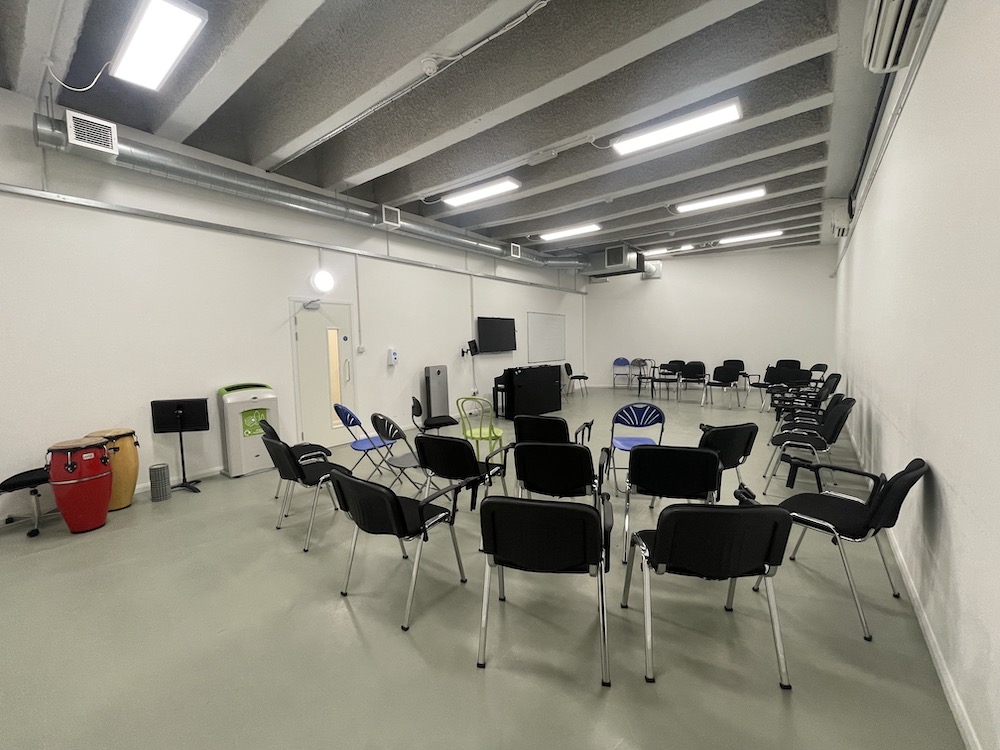
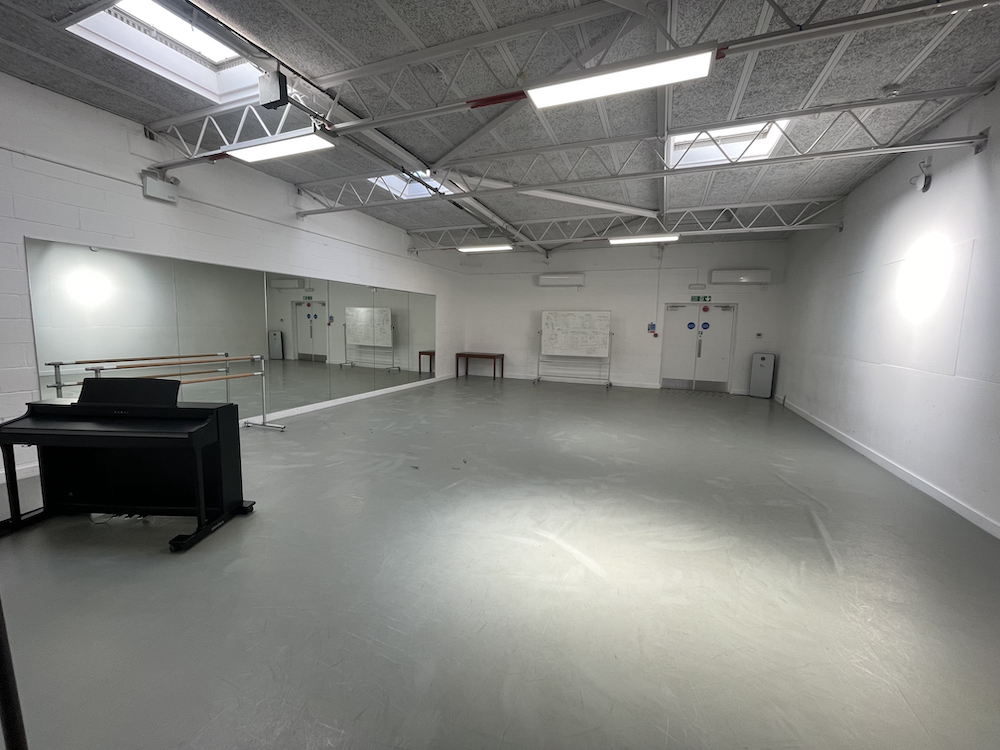
Studio 1
Location
Studio 1 is located on the ground floor of the Laban building.

Dimensions
Length: 10.8m
Width: 12.7m
Area: 137.16m²
Mirrored wall: No
Permanent AV facilities
1 x sound system attached to wall mounted speakers with CD player, Bluetooth Rack Unit Receiver and iPod/laptop input cable.
1 x TV on wheeled mount with attached DVD/BluRay player, and optional HDMI/VGA inputs (cables not provided)
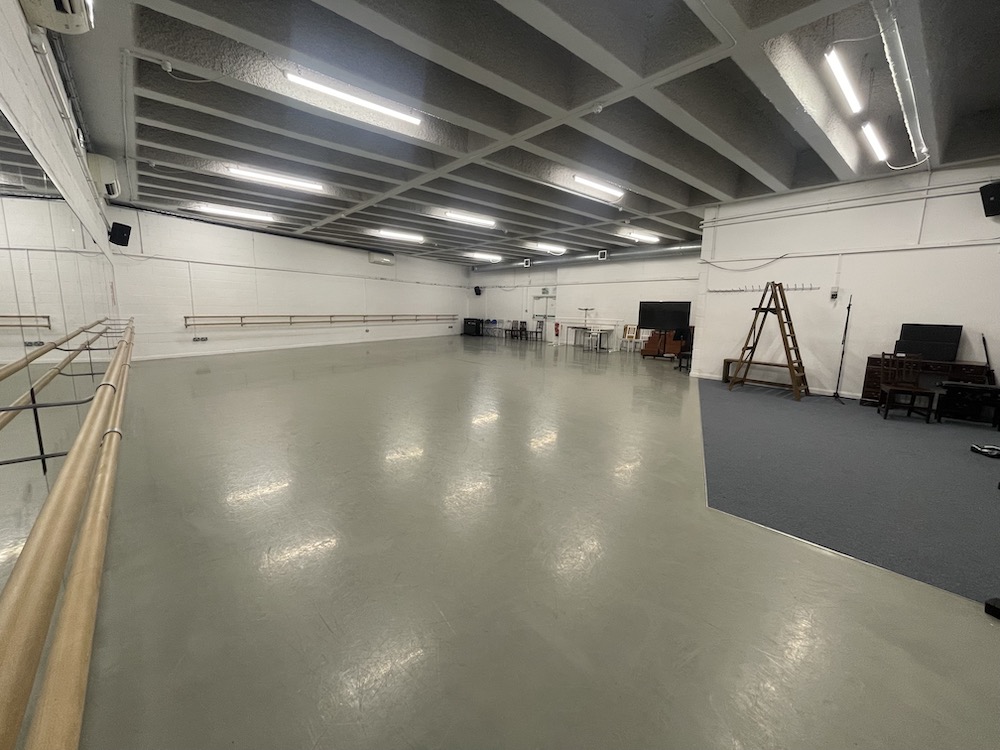
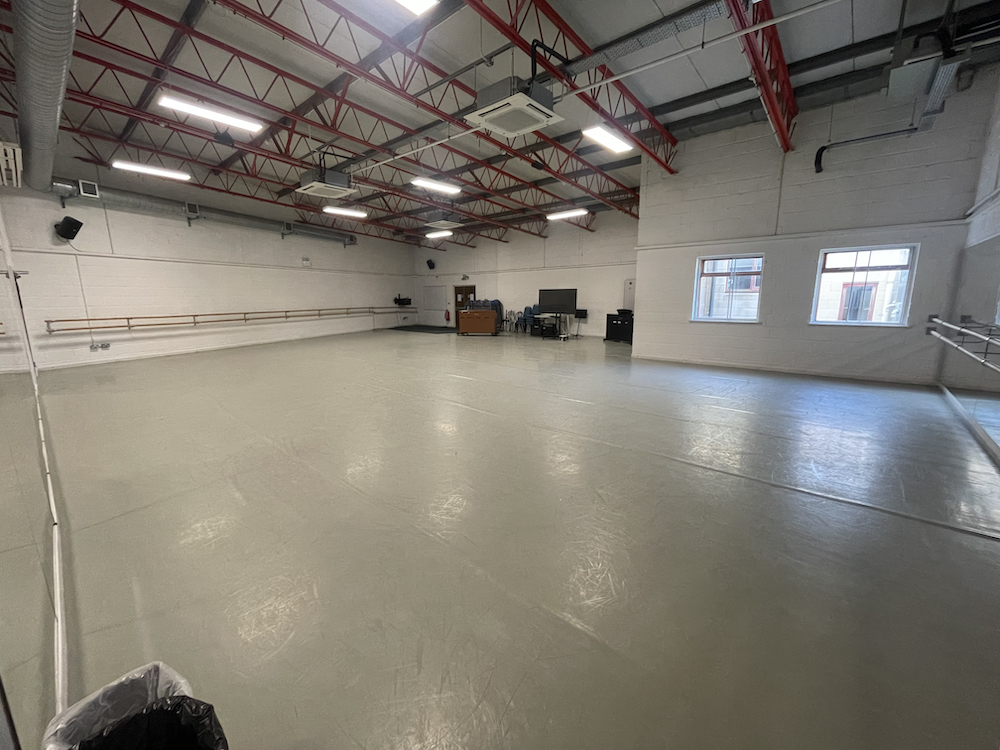
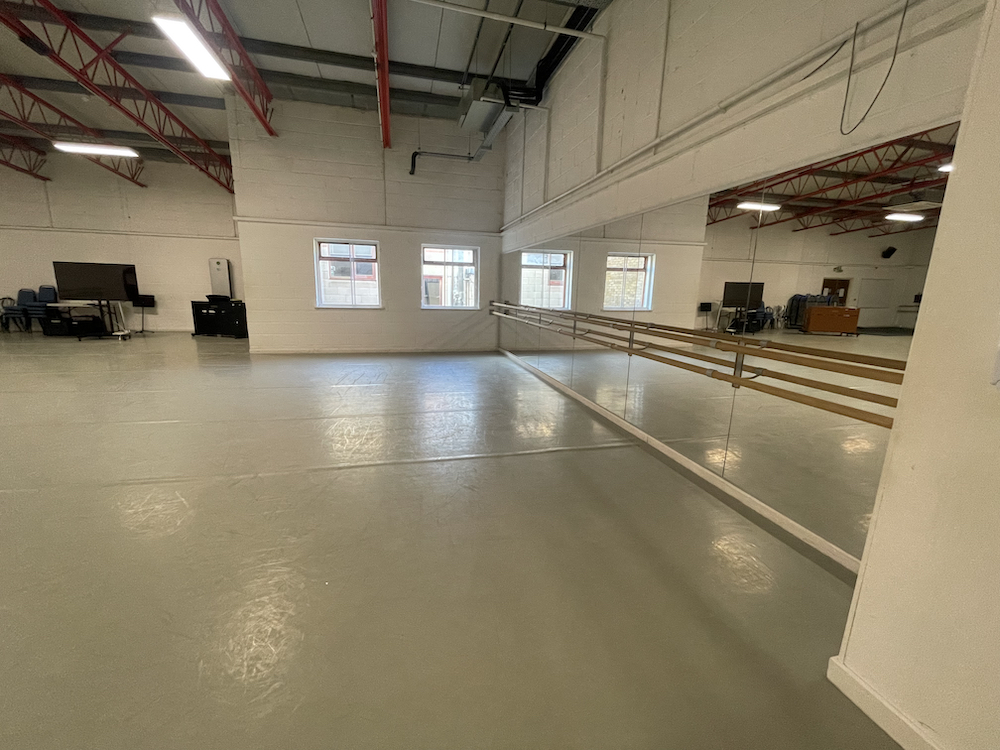
Studio 2
Location
Studio 2 is located on the ground floor of the Laban building.

Dimensions
Length: 18.9m
Width: 9.5m
Area: 179.55m²
Min/Max height: 4m/6.3m
Mirrored wall: Yes
Permanent AV facilities
1 x sound system attached to wall-mounted speakers with CD player, Bluetooth Rack Unit Receiver and iPod/laptop input cable.
1 x TV on wheeled mount with attached DVD/BluRay player, and optional HDMI input (with cable provided).
Using The Bluetooth Receiver
Ensure the Amplifier and the Bluetooth Rack Unit Receiver are turned on.
Hold down the pair button on the receiver until the light starts to blink
Go into your device’s bluetooth menu, select pair new device and select DN-300BR
On the Amplifier switch the input selector to bluetooth.
On the receiver and the amplifier turn up the volume knobs and start playing your music
Studio 3
Studio 3 is located on the 2nd floor of the Laban building.

Dimensions
Length: 15.6m
Width: 9m
Area: 140.4m²
Min/Max height: –
Mirrored wall: Yes
Permanent AV facilities
1 x sound system attached to wall mounted speakers with CD player and iPod/laptop input cable.
1 x TV on wheeled mount with attached DVD/BluRay player, and optional HDMI/VGA inputs (cables not provided)
Studio 4
Studio 4 is located on the 2nd floor of the Laban building.

Dimensions
Length: 18.9m
Width: 9.5m
Area: 179.55m²
Min/Max height: 4.13m/6.18m
Mirrored wall: No.
Permanent AV facilities
1 x sound system attached to wall mounted speakers with CD player and iPod/laptop input cable.
1 x TV on wheeled mount with attached DVD/BluRay player, and optional HDMI/VGA inputs (cables not provided)
Studio 5
Studio 5 is located on the 2nd floor of the Laban building.
Dimensions
Length: 15m
Width: 7.1m
Area: 106.5m²
Min/Max height: –
Mirrored wall: No.
Permanent AV facilities
1 x sound system attached to wall mounted speakers with CD player and iPod/laptop input cable.
1 x TV on wheeled mount with attached DVD/BluRay player, and optional HDMI/VGA inputs (cables not provided)
Studio 6
Studio 6 is located on the 2nd floor of the Laban building.

Dimensions
Length: 11.2m
Width: 6.4m
Area: 71.68m²
Min/Max height: –
Mirrored wall: No
Permanent AV facilities
1 x sound system attached to wall mounted speakers with CD player and iPod/laptop input cable.
1 x TV on wheeled mount with attached DVD/BluRay player, and optional HDMI/VGA inputs (cables not provided)
Studio 7
Studio 7 is located on the 2nd floor of the Laban building.

Dimensions
Length: 12.9m
Width: 8m
Area: 103.2m²
Min/Max height: –
Mirrored wall: Yes
Permanent AV facilities
1 x sound system attached to wall-mounted speakers with CD player and iPod/laptop input (3.5mm) cable.
1 x TV on wheeled mount with attached HDMI cable.
Studio 8
Studio 8 is located on the 2nd floor of the Laban building.

Dimensions
Length: 18.5m
Width: 8.4m
Area: 155.4m²
Min/Max height: –
Mirrored wall: Yes
Permanent AV facilities
1 x sound system attached to wall mounted speakers with CD player, Bluetooth Rack Unit Receiver and iPod/laptop input cable.
1 x TV on wheeled mount with attached DVD/BluRay player, and optional HDMI/VGA inputs (cables not provided)
Studio 9
Studio 9 is located on the 2nd floor of the Laban building.

Dimensions
Length: 11.4m
Width: 13.6m
Area: 155.04m²
Min/Max height: –
Mirrored wall: Yes
Permanent AV facilities
1 x sound system attached to wall mounted speakers with Bluetooth Rack Unit Receiver and iPod/laptop input cable.
1 x TV on wheeled mount with attached DVD/BluRay player, and optional HDMI/VGA inputs (cables not provided)
Studio 10
Studio 10 is located on the 2nd floor of the Laban building.

Dimensions
Length: 19.2m
Width: 11m
Area: 211.2m²
Min/Max height: –
Mirrored wall: No
Permanent AV facilities
1 x sound system attached to wall mounted speakers with CD player, Bluetooth Rack Unit Receiver and iPod/laptop input cable.
1 x TV on wheeled mount with attached DVD/BluRay player, and optional HDMI/VGA inputs (cables not provided)
Studio 11
Studio 11 is located on the 2nd floor of the Laban building.

Dimensions
Length: 12.5m
Width: 13.5m
Area: 168.75m²
Min/Max height: –
Mirrored wall: Yes
Permanent AV facilities
1 x sound system attached to wall mounted speakers with CD player, Bluetooth Rack Unit Receiver and iPod/laptop input cable.
1 x TV on wheeled mount with attached DVD/BluRay player, and optional HDMI/VGA inputs (cables not provided)
Studio 12
Studio 12 is located on the 2nd floor of the Laban building.

Dimensions
Length: 8m
Width: 13m
Area: 104m²
Min/Max height: –
Mirrored wall: Yes
Permanent AV facilities
1 x sound system attached to wall mounted speakers with CD player and iPod/laptop input cable.
1 x TV on wheeled mount with attached DVD/BluRay player, and optional HDMI/VGA inputs (cables not provided)
Seminar Rooms
Seminar Room A
Location
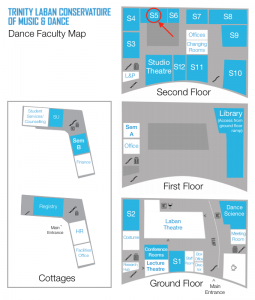
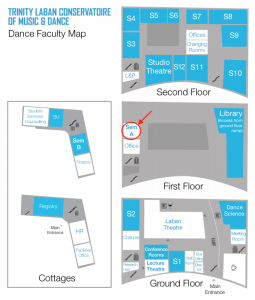
Seminar Room A is located on the 1st floor of the Laban building.
Dimensions
Length: –
Width: –
Area: –
Min/Max height: –
Mirrored wall: No
Permanent AV facilities
1 x built in Windows PC with DVD drive.
1 x VHS player
1 x Projector with options for connection to built PC or laptop with VGA or HDMI connection, and connected audio speakers.
Seminar Room B
Location
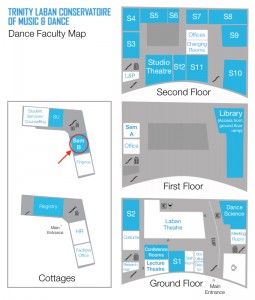
Seminar Room B is located on the 1st floor of the Laban cottages.
Dimensions
Length: –
Width: –
Area: –
Min/Max height: –
Mirrored wall: No
Permanent AV facilities
1 x built in Windows PC (connected to large TV)
1 x Large TV on wheeled mount with optional HDMI/VGA inputs
Meeting Rooms
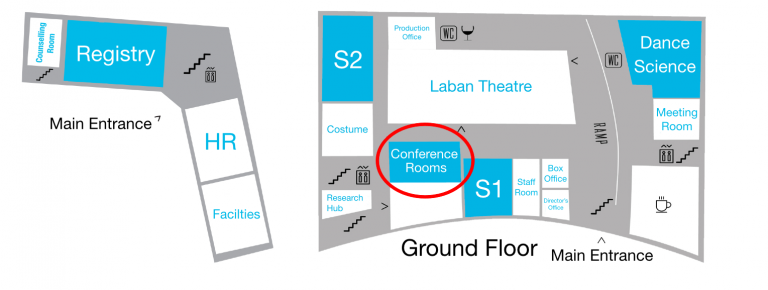
Conference Room 1
Location
Conference Room 1 is located on the ground floor of the Laban building, beside Studio 1
Permanent AV facilities
1 x Mobile flatscreen TV with DVD/Blu Ray Player – includes HDMI cable and adapter for VGA input.
Using the TV in Conference Room 1
Using the DVD Player
- Using the “input” button on the remote, change the channel to HDMI 1.
- Press the power button on the DVD player.
Connecting a HDMI Device
- There should be an HDMI cable already connected to the TV – Connect the other end to your HDMI device.
- Using the “input” button on the remote, change the channel to HDMI 3.
Connecting a VGA Device
- There should be a VGA + Audio Cable already plugged into the VGA > HDMI converter on top of the DVD player – connect the free end to your VGA device, and plug the audio jack into the device’s headphone socket.
- Using the “input” button on the remote, change the channel to HDMI 2.
Conference Room 2
Location
Conference Room 2 is located on the ground floor of the Laban building, beside Conference Room 1.

Permanent AV facilities
1 x Mobile flatscreen TV with DVD/Blu Ray Player – includes HDMI cable and adapter for VGA input.
Using the TV in Conference Room 1
Using the DVD Player
- Using the “input” button on the remote, change the channel to HDMI 1.
- Press the power button on the DVD player.
Connecting a HDMI Device
- There should be an HDMI cable already connected to the TV – Connect the other end to your HDMI device.
- Using the “input” button on the remote, change the channel to HDMI 3.
Connecting a VGA Device
- There should be a VGA + Audio Cable already plugged into the VGA > HDMI converter on top of the DVD player – connect the free end to your VGA device, and plug the audio jack into the device’s headphone socket.
- Using the “input” button on the remote, change the channel to HDMI 2.
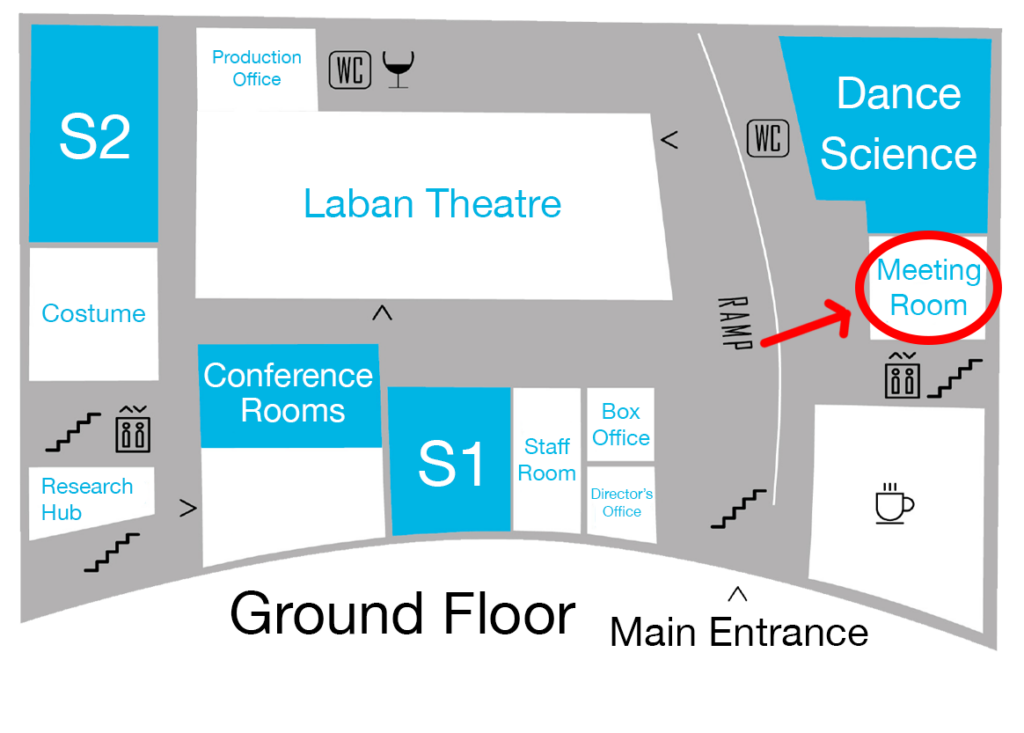
Cafe Meeting Room
Location
The Cafe Meeting Room is located on the ground floor of the Laban building, beside the entrance to the cafeteria.
Dimensions
Length – 9m
Width – 5.4 – 7.2m
Area – 56.7m²
Height – 2.4m
Mirrored wall No
Permanent AV facilities
1 x Mobile flatscreen TV with DVD/Blu Ray Player – includes HDMI cable and adapter for VGA input.
Using the TV in the Cafe Meeting Room
Using the DVD Player
- Using the “input” button on the remote, change the channel to HDMI 1.
- Press the power button on the DVD player.
Connecting a HDMI Device
- There should be an HDMI cable already connected to the TV – Connect the other end to your HDMI device.
- Using the “input” button on the remote, change the channel to HDMI 3.
Connecting a VGA Device
- There should be a VGA + Audio Cable already plugged into the VGA > HDMI converter on top of the DVD player – connect the free end to your VGA device, and plug the audio jack into the device’s headphone socket.
- Using the “input” button on the remote, change the channel to HDMI 2.
Lecture Theatre
The Lecture theatre is located on the Ground floor of the Laban building.
Dimensions
Length: 11m
Width: 9m
Area: 99m²
Mirrored wall: No
Permanent AV facilities
1 x Windows PC
1 x 4K enhanced Projector with options for connection to the PC or a laptop with VGA or HDMI connection.
1 x sound system and wall-mounted speakers.
Additional Information
You can set which mode to display your image, from your computer.
If using a Windows laptop, push the Windows + P key to choose between Extend and Duplicate.
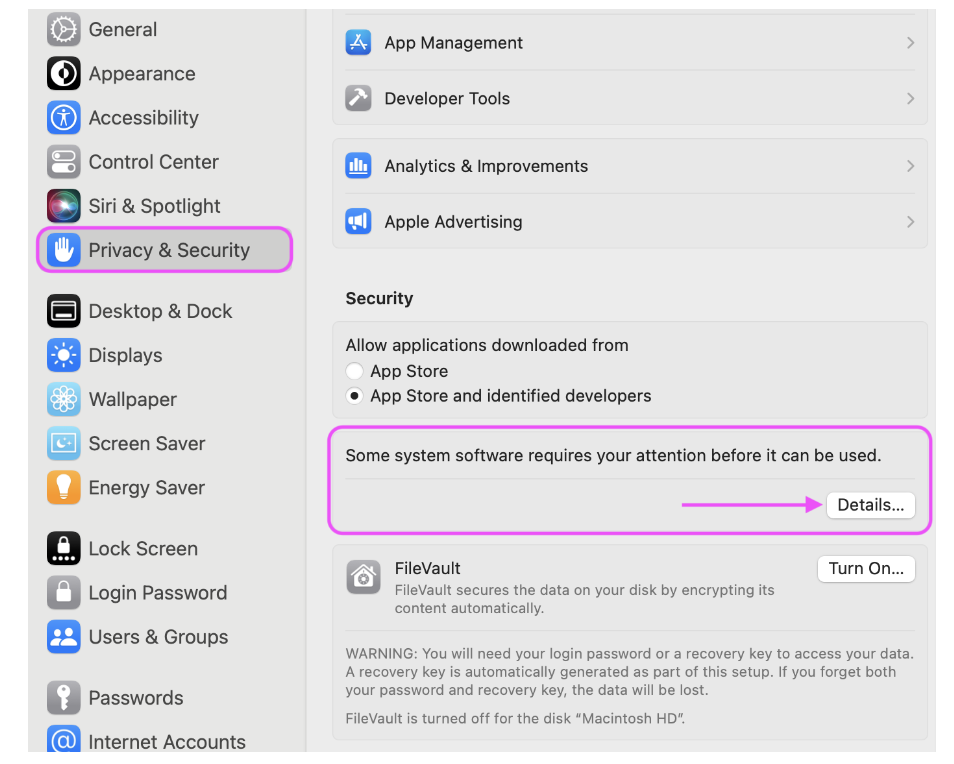
On a Macbook, click the Apple icon > System Preferences > Displays > Arrangement, and check the box which says “Mirror Display”.
When extended, the projection will act as an additional screen you can drag stuff to, whereas duplicate will mirror what is already on your computer screen.
Other Spaces
Laban Library
Location
Conference Room 1 is located on the first floor of the Laban building.
Permanent AV facilities
1 x VHS Player
3 x high-spec iMacs with specialist multimedia software.
Using the iMacs in Laban Library
What software is on the devices?
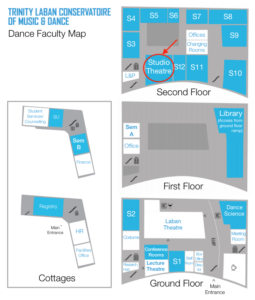
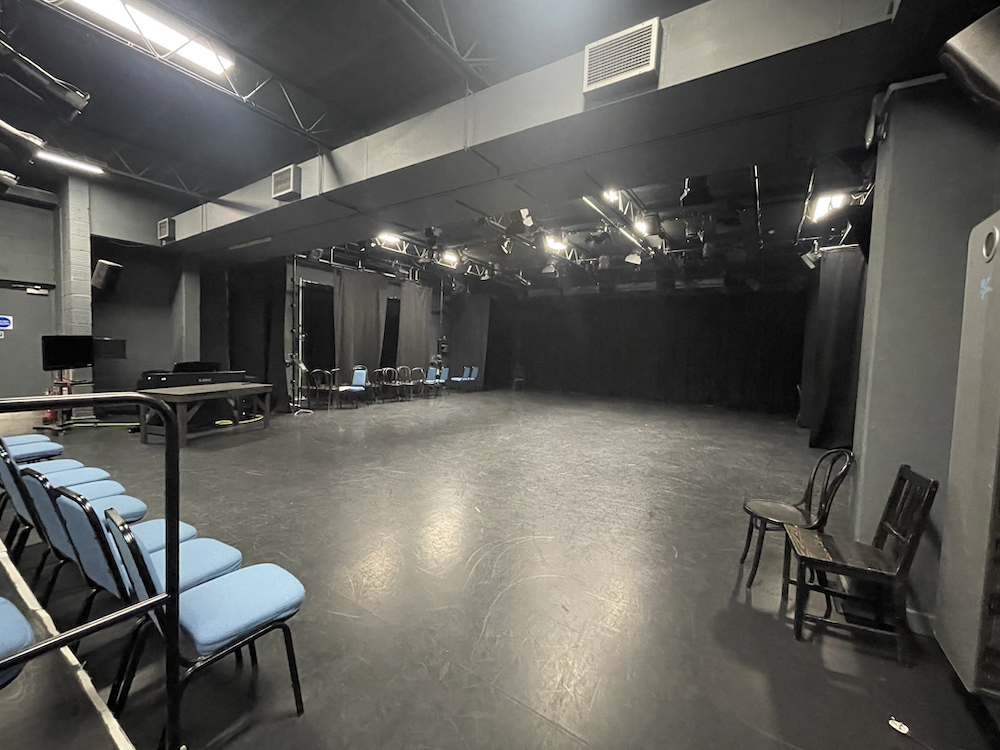
Studio Theatre
Location
The Studio Theatre is located on the 2nd floor of the Laban building
Permanent AV facilities
1 x Projector with options for connection to a laptop with VGA or HDMI connection.
1 x sound system attached to wall mounted speakers with CD player and iPod/laptop input cable.
1 x TV on wheeled mount with attached DVD/BluRay player, and HDMI inputs (cable provided)
Connecting a laptop to the Projector with a HDMI cable
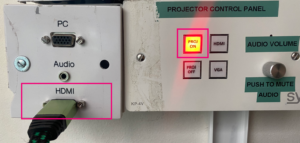
-
- Turn on the projector using the PROJ ON button.
- Connect the HDMI cable to your laptop.
- Push the HDMI button on the front of the panel.
- If your projection has sound, you can adjust the levels with the audio volume dial on the control panel. If you can not hear any sound, please check (on the other side of the room) that the amplifier is turned on and the input dial for the Projector VGA is turned up.
King Charles Court (KCC)
3.12
3.12 is located on the third floor of the West Wing at King Charles Court.

Permanent AV Facilities
1 x HIFI system that can only be used for playback, this comes with an aux in cable that can be plugged into the headphones output of a laptop or mobile phone.
1 x Large flat screen TV, which is fixed to an immovable unit. This has an HDMI lead to plug into a laptop and a remote control.
311
311 is located on the third floor of the West Wing at King Charles Court.
This room is setup as listening and music production space.
Please email avsupport.music@trinitylaban.ac.uk for more information on this.
For details of the equipment installed in the room please see list below.
Permanent AV Facilities
2 x Focal Shape 50 monitor speakers
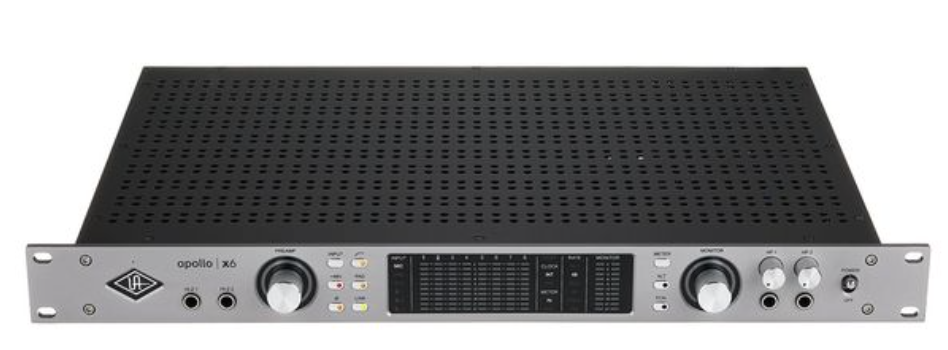
1 x Audient id4 usb-c audio interface

Recording Studio (G.20 & G.21)
How to book the Recording Studio
We have an online booking system where you can see the studio’s live availability (please note that bookings are only pending until payment is made).
If you have any questions before booking, please contact recordingstudio@trinitylaban.ac.uk.
How much does it cost?
All sessions are offered together with a recording engineer.
Students & staff
Students on some courses/activities get free allocations of time in the studio. See articles for BAMPI, Composition, Artist Diploma, and Exchange Application students.
Short (2 hours) – £40
Suited to classical audition tapes, overdubs, simple or small scale, 1 or 2 pieces.
Additional hours, mixing, or mastering: £14 / hour (or part of an hour)
Medium (3.5 hours) – £60
Suited to solo or small ensemble/small band recording, a couple of pieces with a few takes for each.
Additional hours, mixing, or mastering: £14 / hour (or part of an hour)
Long (7 hours + 1 hour break) – £100
Suited to band sessions and where more material needs to be recorded with multiple takes.
Additional hours, mixing, or mastering: £14 / hour (or part of an hour)
Alumni
Short (2 hours) – £80
Suited to classical audition tapes, overdubs, simple or small scale, 1 or 2 pieces.
Additional hours, mixing, or mastering: £18 / hour (or part of an hour)
Medium (3.5 hours) – £120
Suited to solo or small ensemble/small band recording, a couple of pieces with a few takes for each.
Additional hours, mixing, or mastering: £18 / hour (or part of an hour)
Long (7 hours + 1 hour break) – £200
Suited to band sessions and where more material needs to be recorded with multiple takes.
Additional hours, mixing, or mastering: £18 / hour (or part of an hour)
External
Short (2 hours) – £120
Suited to classical audition tapes, overdubs, simple or small scale, 1 or 2 pieces.
Additional hours, mixing, or mastering: £18 / hour (or part of an hour)
Medium (3.5 hours) – £200
Suited to solo or small ensemble/small band recording, a couple of pieces with a few takes for each.
Additional hours, mixing, or mastering: £18 / hour (or part of an hour)
Long (7 hours + 1 hour break) – £350
Suited to band sessions and where more material needs to be recorded with multiple takes.
Additional hours, mixing, or mastering: £18 / hour (or part of an hour)
What’s included in the rates?
- Use of the Recording Studio and Control Room, the recording equipment and the instruments therein.
- One of our engineers to work with you.
Getting more information
For further information about the Recording Studio, don’t hesitate to get in touch with us. The full terms and conditions of Recording Studio bookings are available online.
How to book time in the Recording Studio as a BAMPI Student
How much free time do I get in the Recording Studio?
BAMPI students currently get 4 hours each per academic year without charge. Any additional time in the Recording Studio would be charged at the usual rates.
How do I book my free time?
There are 3 durations of recording sessions available: Short (2 hours), Medium (3.5 hours), and Long (7 hours + 1 hour lunch). Please use the links on the main article about the Recording Studio to the online booking system which should be used to see when there is availability for each of the different session types.
In order to use your free hours allocation, you must fill out the booking form correctly, ensuring the following fields are correctly input:
- Select from Your course of study dropdown list: BAMPI
- In the “Any additional comments or requests” field at the bottom of the form, you must list the students’ names and how much of their free allocation should be used. This enables bands to split the session’s cost between them, for example for a 3.5 hour session the allocation could be split as such:
- Person A – 1.5 hours
- Person B – 1 hour
- Person C – 1 hour
The student’s name and number of hours’ of allocation MUST be included when booking a session, otherwise an invoice for the session will be raised.
How do I check what my free hours allocation is?
If you’re uncertain how many hours of your allocation you’ve used, we keep detailed records, so can provide the remaining allocation to students on request. Please email recordingstudio@trinitylaban.ac.uk to request this.
Terms and conditions
Regular Recording Studio Terms and Conditions apply to all bookings. Free time allocations are set by the Creative Technology Services Manager together with course leaders. Allocations are reviewed every academic year, and there is no guarantee that allocations will remain as above for future years.
How to book time in the Recording Studio as a Composition Student
How much free time do I get in the Recording Studio?
Composition students currently get 4 hours each per academic year without charge. Any additional time in the Recording Studio would be charged at the usual rates.
How do I book my free time?
There are 3 durations of recording sessions available: Short (2 hours), Medium (3.5 hours), and Long (7 hours + 1 hour lunch). Please use the links on the main article about the Recording Studio to the online booking system which should be used to see when there is availability for each of the different session types.
In order to use your free hours allocation, you must fill out the booking form correctly, ensuring the following fields are correctly input:
- Select from Your course of study dropdown list: Composition (BMus or MMus)
- In the “Any additional comments or requests” field at the bottom of the form, you must list each of the students’ names and how much of their free allocation should be used. This enables bands to split the session’s cost between them, for example for a 3.5 hour session the allocation could be split as such:
- Person A – 1.5 hours
- Person B – 1 hour
- Person C – 1 hour
The student’s name and number of hours’ of allocation MUST be included when booking a session, otherwise an invoice for the session will be raised.
How do I check what my free hours allocation is?
If you’re uncertain how many hours of your allocation you’ve used, we keep detailed records, so can provide the remaining allocation to students on request. Please email recordingstudio@trinitylaban.ac.uk to request this.
Terms and conditions
Regular Recording Studio Terms and Conditions apply to all bookings. Free time allocations are set by the Creative Technology Services Manager together with course leaders. Allocations are reviewed every academic year, and there is no guarantee that allocations will remain as above for future years.
How to book time in the Recording Studio as an Artist Diploma Student
How much free time do I get in the Recording Studio?
Artist Diploma students currently get 6 hours each without charge. Any additional time in the Recording Studio would be charged at the usual rates.
How do I book my free time?
There are 3 durations of recording sessions available: Short (2 hours), Medium (3.5 hours), and Long (7 hours + 1 hour lunch). Please use the links on the main article about the Recording Studio to the online booking system which should be used to see when there is availability for each of the different session types.
In order to use your free hours allocation, you must fill out the booking form correctly, ensuring the following fields are correctly input:
- Select from Your course of study dropdown list: PgAD
- In the “Any additional comments or requests” field at the bottom of the form, you must list the students’ names and how much of their free allocation should be used. This enables bands to split the session’s cost between them, for example for a 3.5 hour session the allocation could be split as such:
- Person A – 1.5 hours
- Person B – 1 hour
- Person C – 1 hour
The student’s name and number of hours’ of allocation MUST be included when booking a session, otherwise an invoice for the session will be raised.
How do I check what my free hours allocation is?
If you’re uncertain how many hours of your allocation you’ve used, we keep detailed records, so can provide the remaining allocation to students on request. Please email recordingstudio@trinitylaban.ac.uk to request this.
Terms and conditions
Regular Recording Studio Terms and Conditions apply to all bookings. Free time allocations are set by the Creative Technology Services Manager together with course leaders. Allocations are reviewed every academic year, and there is no guarantee that allocations will remain as above for future years.
How to book time in the Recording Studio as a Exchange Application Student
How much free time do I get in the Recording Studio?
Exchange Application students currently get 2 hours each without charge to support Erasmus application recording. Any additional time in the Recording Studio would be charged at the usual rates.
How do I book my free time?
There are 3 durations of recording sessions available: Short (2 hours), Medium (3.5 hours), and Long (7 hours + 1 hour lunch). Please use the links on the main article about the Recording Studio to the online booking system which should be used to see when there is availability for each of the different session types.
In order to use your free hours allocation, you must fill out the booking form correctly, ensuring the following fields are correctly input:
- Select from the Purpose of Recordings dropdown list: Exchange Application
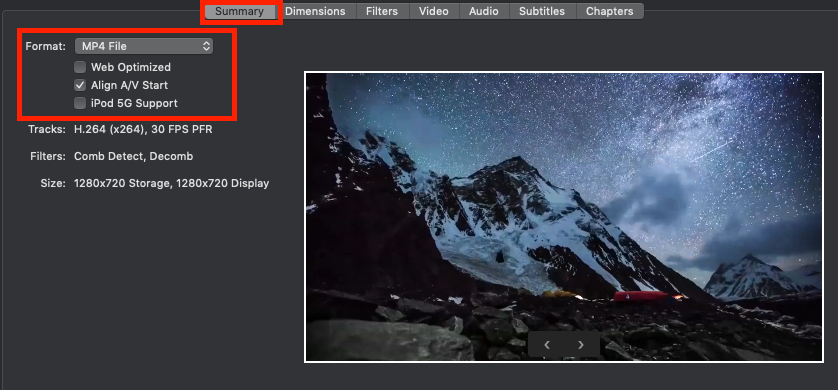
Please let us know know when you book which formats your application requires: CD, audio mp3 file, or video mp4 file.
All file preparation except video conversion happens during your time allocation, which is 2 hours for either an audio-only, or a video-only session; however if your application requires both audio and video recordings, there is an additional 15 minutes setup time at start, and additional 15 mins tech time at the end.
Regarding the recording: “No editing is allowed on any application material for the Erasmus scheme. Discs must be signed [by the Recording Engineer or your Teacher] with a statement saying that the recording is the students own unedited performance.” and we will not edit them.
Further, video recordings are not trimmed either, the Engineer starts and stops the camera, and that is what is submitted.
How do I check what my free hours allocation is?
If you’re uncertain how many hours of your allocation you’ve used, we keep detailed records, so can provide the remaining allocation to students on request. Please email recordingstudio@trinitylaban.ac.uk to request this.
Terms and conditions
Regular Recording Studio Terms and Conditions apply to all bookings. Free time allocations are set by the Creative Technology Services Manager together with course leaders. Allocations are reviewed every academic year, and there is no guarantee that allocations will remain as above for future years.
2.22
2.22 is located on the second floor of the East Wing at King Charles Court.

Permanent AV Facilities
1 x active PA stereo system
1 x Large flat screen TV with HDMI
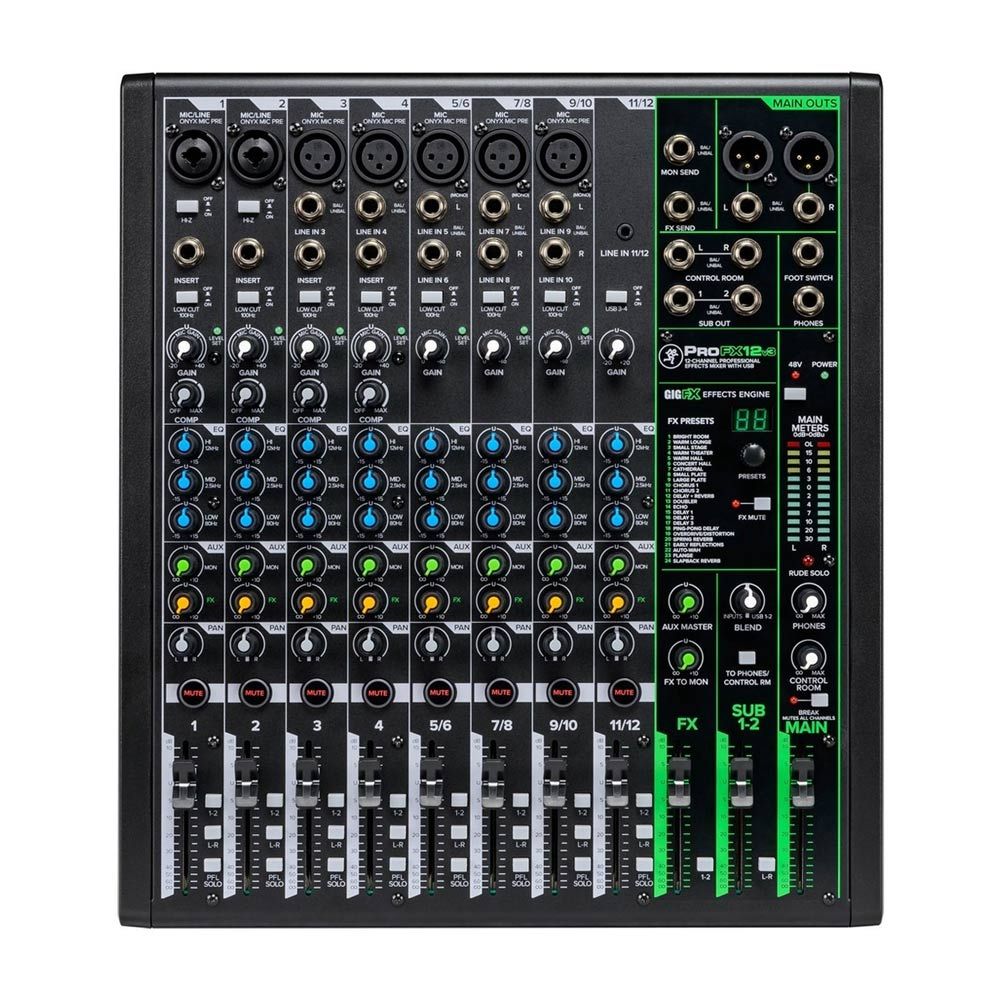
1 x Mackie ProFx12 v3 mixing desk
G.48
G.48 is located on the ground floor of the East Wing at King Charles Court.

Permanent AV Facilities
1 x Mackie stereo PA system
1 x Large flat screen TV
1 x Mackie ProFx12
1 x Grand Piano
1 x Fender Rumble 500
1 x Blues Cube Amp
G.17
G.17 is located on the ground floor of the West Wing at King Charles Court. It is accessible through Butlers Bar.

Permanent AV Facilities
1 x Mackie stereo PA system
1 x Large flat screen TV
1 x Mackie ProFX 12 mixer
1 x Nord Keyboard
1 x Drum Kit
1 x Fender Twin Amp
1 x Grand Piano
1 x Bass Amp
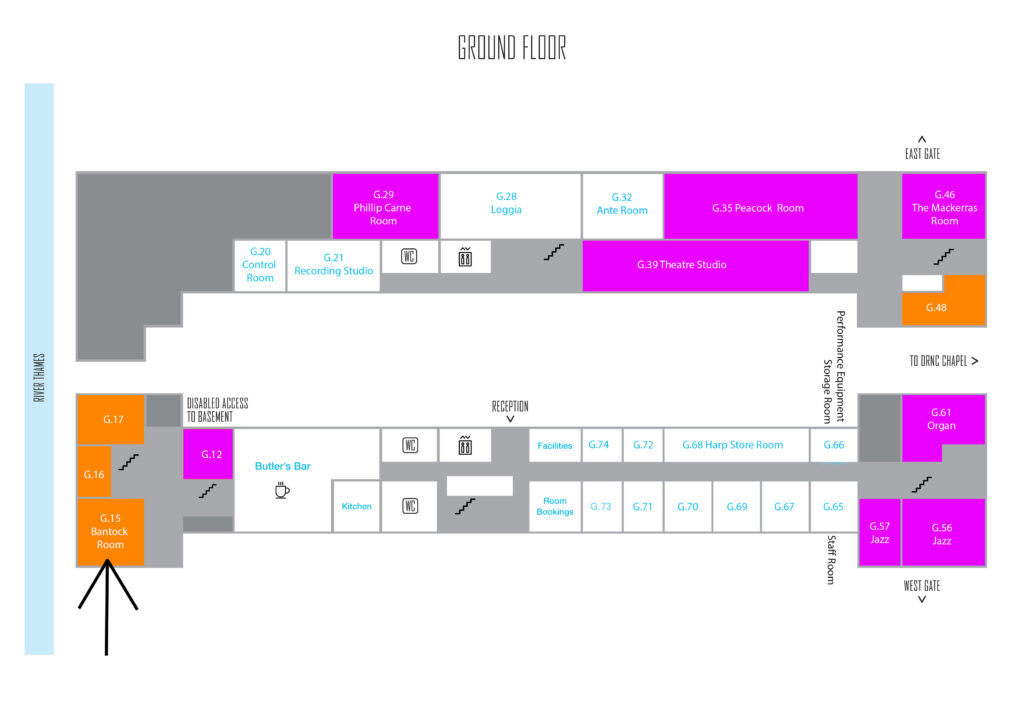
G.15 (Bantock Room)
Bantock Room (G.15) is located on the ground floor of the West Wing at King Charles Court. It is accessible through Butlers Bar.
Permanent AV Facilities
1 x Mackie stereo PA system
1 x Large flat TV screen
1 x Mackie ProFX 12 mixer
1 x Nord Keyboard
1 x Drum Kit
1 x Fender Twin Amp
1 x Grand Piano
1 x Marshall Amp
1 x Bass Amp
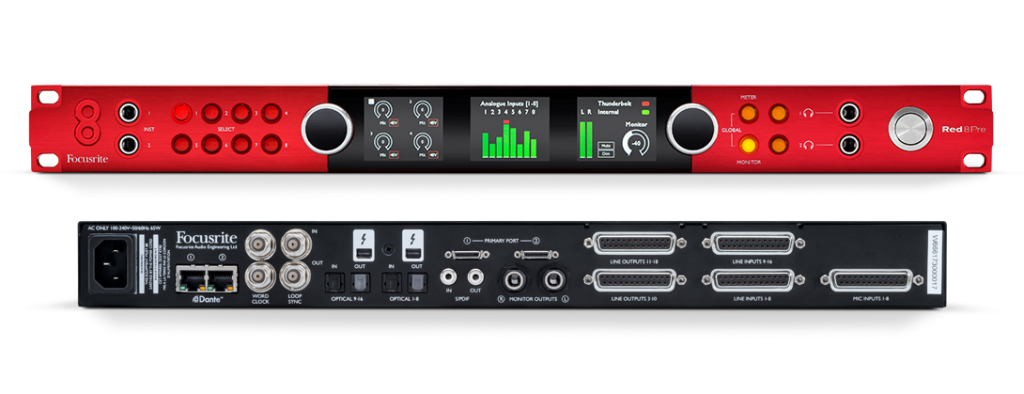
1 x Focusrite Red8Pre
2 x Genelec monitor speakers
1x 8ch Stage Box
3.04
3.04 is located on the third floor of the West Wing at King Charles Court.
This room is setup as music production/mixing room. It can also be used in conjunction with it’s three neighbouring rooms – 3.03, 304, 3.05 (3.04 being the control room).
Please email avsupport.music@trinitylaban.ac.uk for more information on this.
For details of the equipment installed in the room please see the .pdf below.
Permanent AV Facilities
2 x Genelec 8030d monitor speakers
1 x Mac Mini (with Logic Pro, Ableton Live, FabFilters)
1 x Focusrite Red8Pre
1 x Subzero HP amp
1 x Mackie Monitor Controller
1 x Axiom Pro MIDI controller
1 x Yamaha CP88 electric piano
1 x Mark Bass Amp
1 x Fender Twin Amp

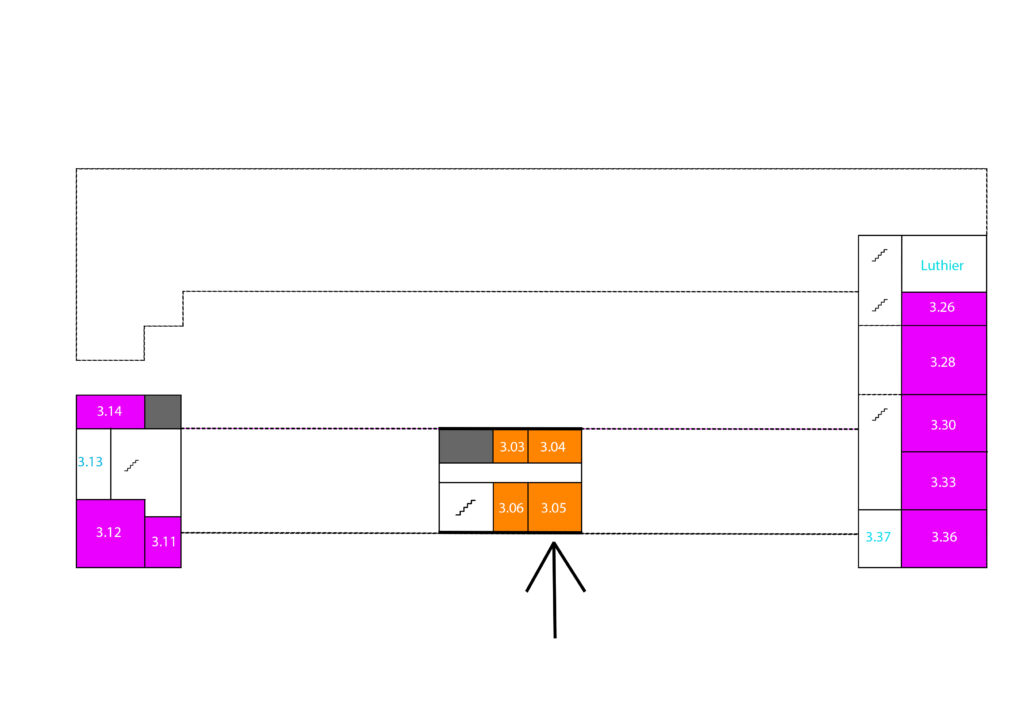
3.05
3.05 is located on the third floor of the West Wing at King Charles Court.
Whilst this room is setup to be used as its own rehearsal and recording space, it can also be used in conjunction with it’s three neighbouring rooms – 3.03, 304, 3.06 (3.04 being the control room).
Please email avsupport.music@trinitylaban.ac.uk for more information on this.
For details of the equipment installed in the room please see the .pdf below.
Permanent AV Facilities
1 x Mackie PA speaker
1 x Power Amp
1 x Focusrite Red8Pre
1 x Mackie ProFx12 mixer
1 x Yamaha CP88 electric piano
1 x Mark Bass Amp
1 x Fender Twin Amp
1 x Drumkit
3.03
3.03 is located on the third floor of the West Wing at King Charles Court.
Whilst this room is setup to be used as its own rehearsal and recording space. It can also be used in conjunction with it’s three neighbouring rooms – 304, 3.05, 3.06 (3.04 being the control room).
Please email avsupport.music@trinitylaban.ac.uk for more information on this.
For details of the equipment installed in the room please see the .pdf below.
1 x LD PA speaker
1 x Focusrite Red8Pre
1 x Mackie ProFx12 mixer
2 x Drumkit

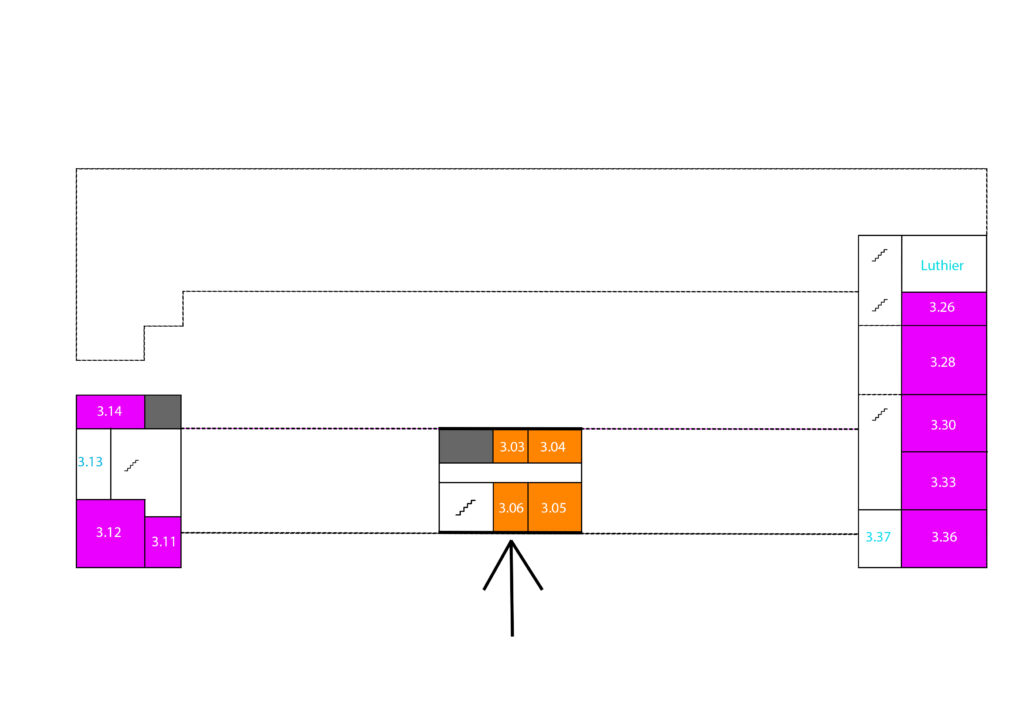
3.06
3.06 is located on the third floor of the West Wing at King Charles Court.
Whilst this room is setup to be used as its own rehearsal and recording space. It can also be used in conjunction with it’s three neighbouring rooms – 3.03, 304, 3.05 (3.04 being the control room).
Please email avsupport.music@trinitylaban.ac.uk for more information on this.
For details of the equipment installed in the room please see the .pdf below.
1 x Mackie PA speaker
1 x Power Amp
1 x Focusrite Red8Pre
1 x Mackie ProFx12 mixer
1 x Yamaha CP88 electric piano
1 x Mark Bass Amp
1 x Fender Twin Amp
1 x Drumkit
1.57
1.57 is located on the first floor of the West Wing at King Charles Court.
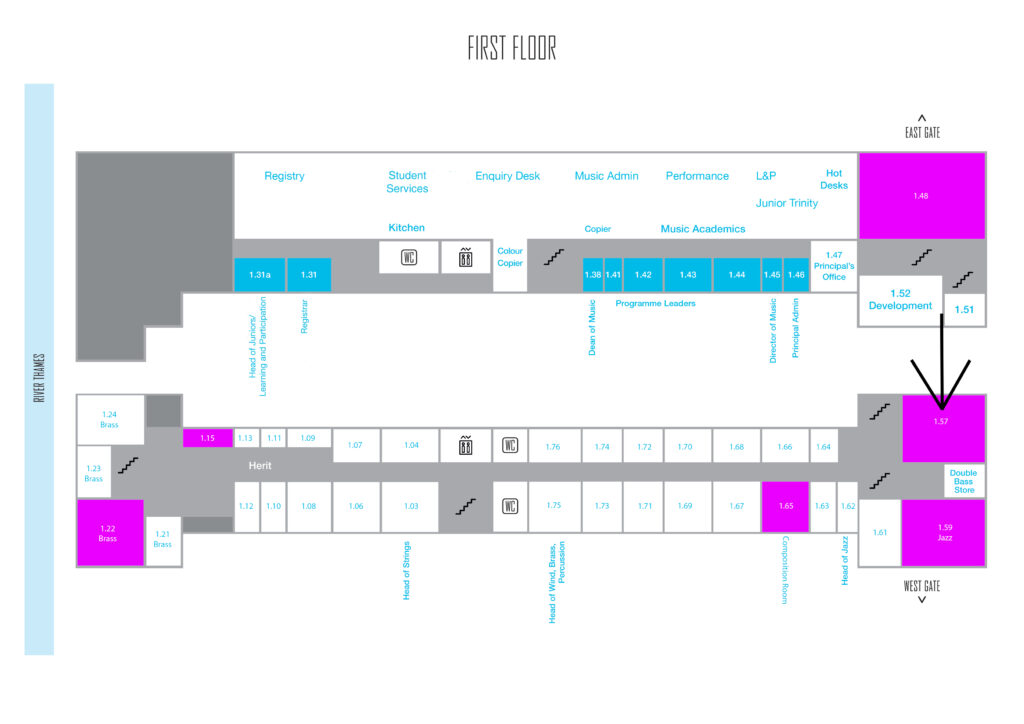
Permanent AV Facilities
1 x PA system with a mixing desk, this comes with an aux in cable that can be plugged into the headphones output of a laptop or mobile phone. The desk also has 8 microphone (XLR) inputs for use with additional equipment like audio interfaces and microphones.
To download the instruction manual for the mixing desk click on the link here – https://loudaudio.netx.net/api/file/asset/18479?sessionKey=H6hp88ql8fwuzSFgOuah4ytBO
1 x Large flat screen TV, which is fixed to an immovable unit. This has an HDMI lead to plug into a laptop and a remote control.
1.59
1.59 is located on the first floor of the West Wing at King Charles Court.
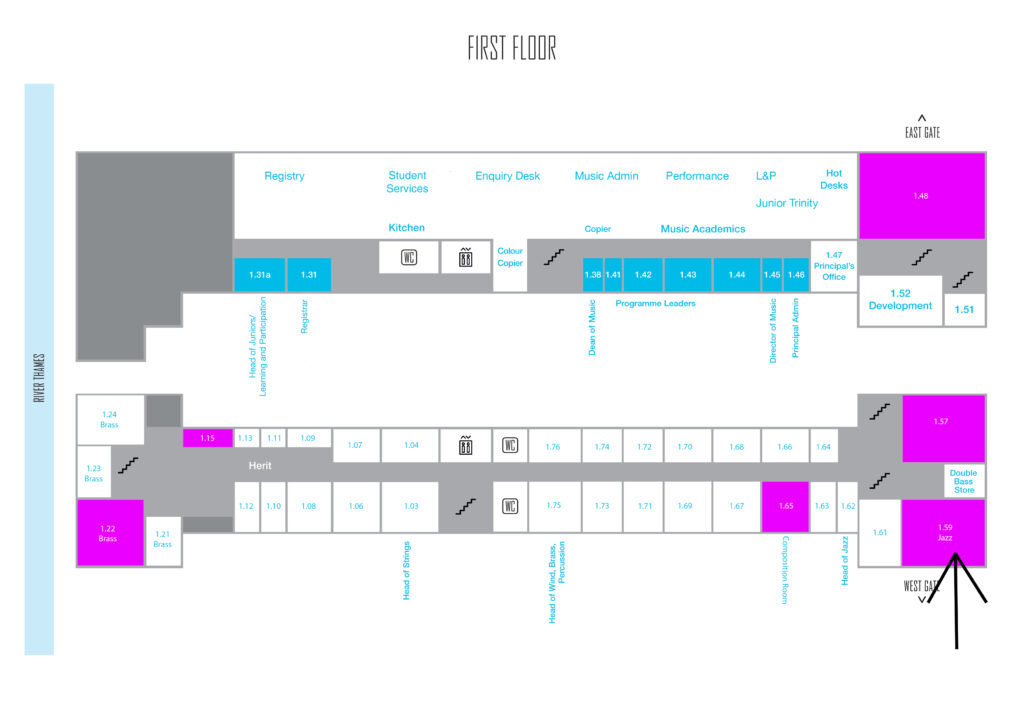
Permanent AV Facilities
1 x PA system with a mixing desk, this comes with an aux in cable that can be plugged into the headphones output of a laptop or mobile phone. The desk also has 8 microphone (XLR) inputs for use with additional equipment like audio interfaces and microphones.
To download the instruction manual for the mixing desk click on the link here – https://loudaudio.netx.net/api/file/asset/18479?sessionKey=H6hp88ql8fwuzSFgOuah4ytBO
1 x Large flat screen TV, which is fixed to an immovable unit. This has an HDMI lead to plug into a laptop and a remote control.
1.22
1.22 is located on the first floor of the West Wing at King Charles Court. It is accessible from the doors off of College Way, opposite the Painted Chapel.
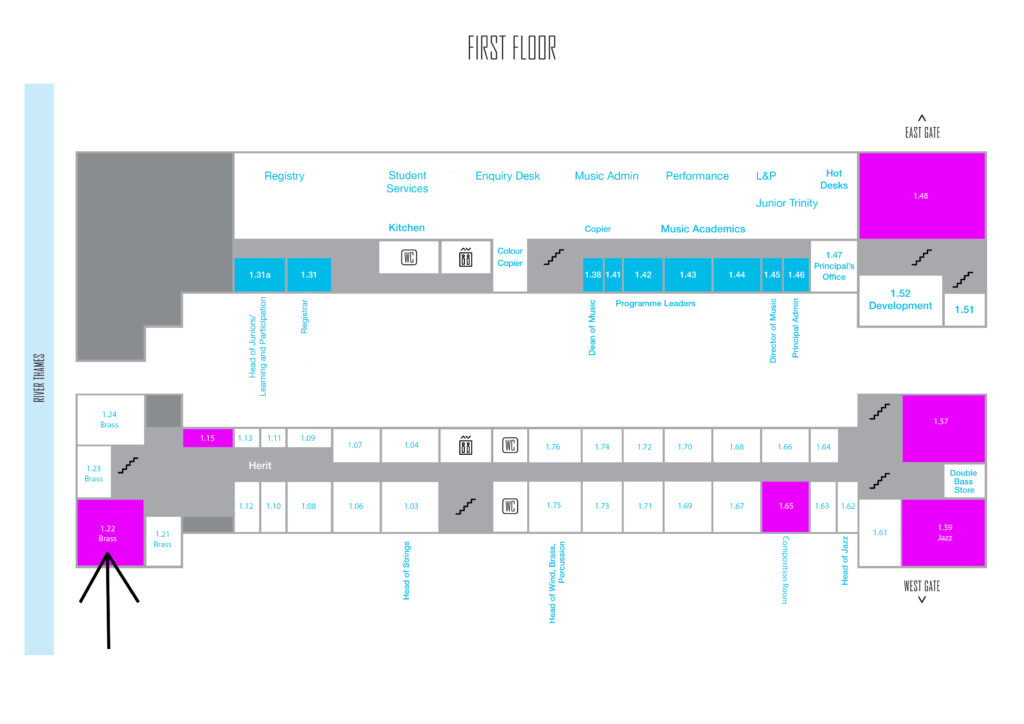
Permanent AV Facilities
1 x PA system with a rack mounted mixer, this comes with an aux in cable that can be plugged into the headphones output of a laptop or mobile phone. The mixer also has 2 microphone (XLR) inputs for use with additional equipment like audio interfaces and microphones.
1 x Large flat screen TV, which is fixed to an immovable unit. This has an HDMI lead to plug into a laptop and a remote control.
1.48 (Baylis Room)
The Baylis Room (1.48) is located on the first floor of the East Wing at King Charles Court. It is accessible from the doors off of College Way, opposite the Painted Chapel.
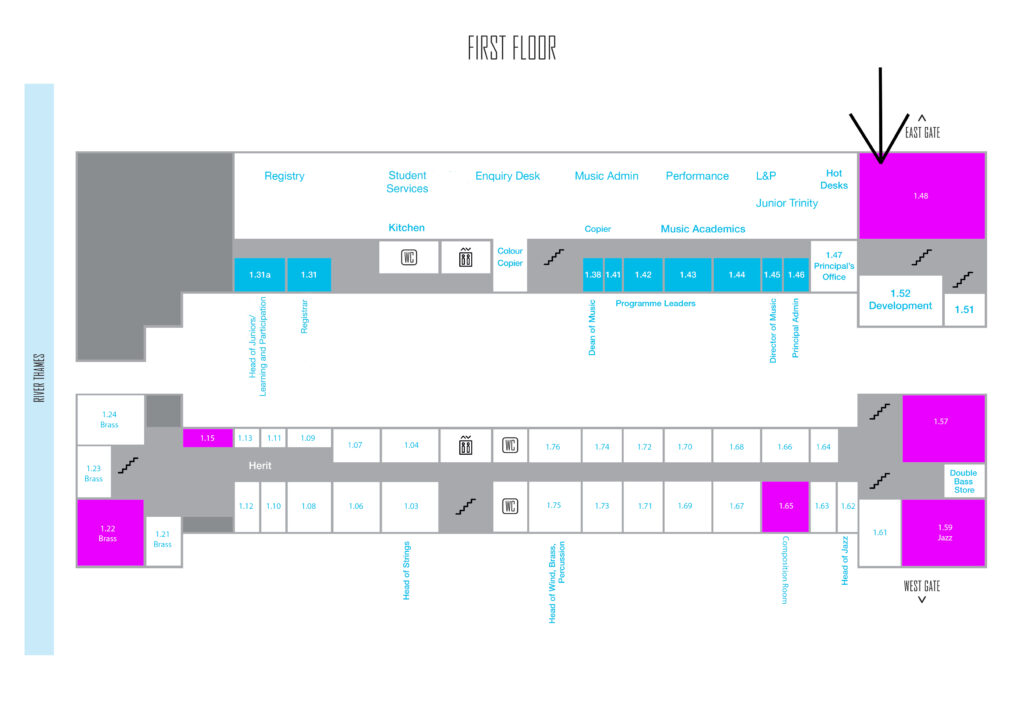
Permanent AV Facilities
1 x PA system with a rack mounted mixer, this comes with an aux in cable that can be plugged into the headphones output of a laptop or mobile phone. The mixer also has 2 microphone (XLR) inputs for use with additional equipment like audio interfaces and microphones.
1 x Large flat screen TV, which is fixed to an immovable unit. This has an HDMI lead to plug into a laptop and a remote control.
3.14
3.14 is located on the third floor of the West Wing at King Charles Court.

Permanent AV Facilities
1 x HIFI system that can only be used for playback, this comes with an aux in cable that can be plugged into the headphones output of a laptop or mobile phone.
1 x Large flat screen TV, which is fixed to an immovable unit. This has an HDMI lead to plug into a laptop and a remote control.
2.43 (Keyboard Lab)
The keyboard lab (2.43) is located on the 2nd floor of the East Wing at King Charles Court.

It contains 12 student computers each with a large MIDI keyboard, an audio interface and a pair of headphones. A teacher’s computer attached to 2 screens and a PA system.
Software on the computers
All computers contain the following software:
- Ableton Live
- DaVinci Resolve
- FabFilter Pro
- Final Cut Pro
- Logic Pro
3.28
3.28 is located on the third floor of the West Wing at King Charles Court.

Permanent AV Facilities
1 x PA system with a rack mounted mixer, this comes with an aux in cable that can be plugged into the headphones output of a laptop or mobile phone. The mixer also has 2 microphone (XLR) inputs for use with additional equipment like audio interfaces and microphones.
1 x Large flat screen TV, which is fixed to an immovable unit. This has an HDMI lead to plug into a laptop and a remote control.
3.30
3.30 is located on the third floor of the West Wing at King Charles Court.
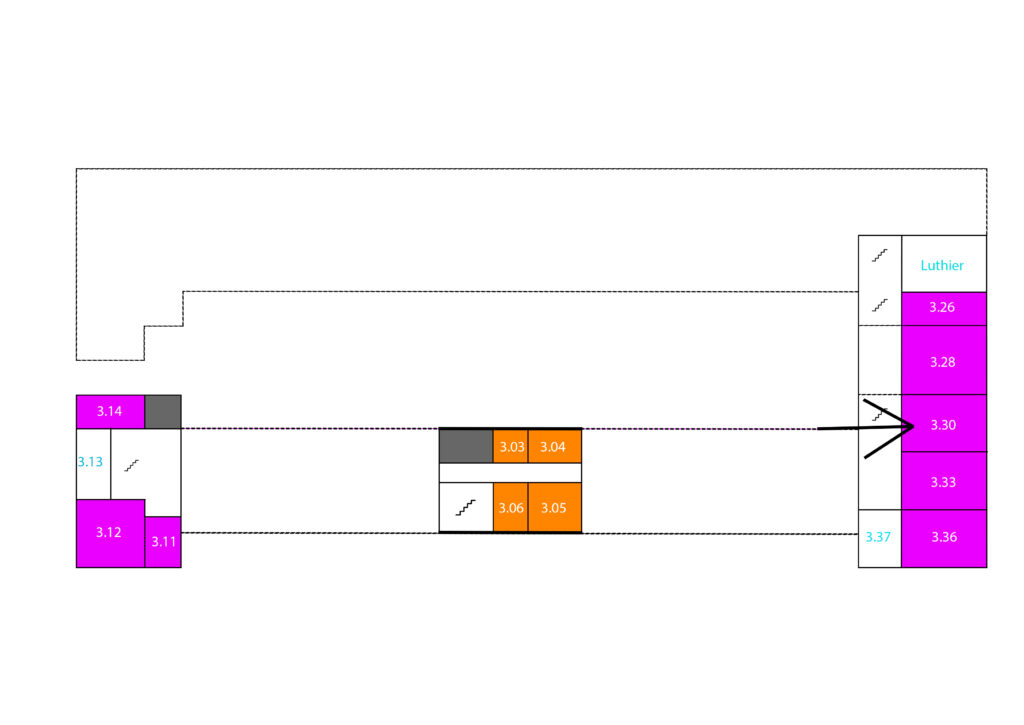
Permanent AV Facilities
1 x PA system with a rack mounted mixer, this comes with an aux in cable that can be plugged into the headphones output of a laptop or mobile phone. The mixer also has 2 microphone (XLR) inputs for use with additional equipment like audio interfaces and microphones.
1 x Large flat screen TV, which is fixed to an immovable unit. This has an HDMI lead to plug into a laptop and a remote control.
3.36
3.36 is located on the third floor of the West Wing at King Charles Court.
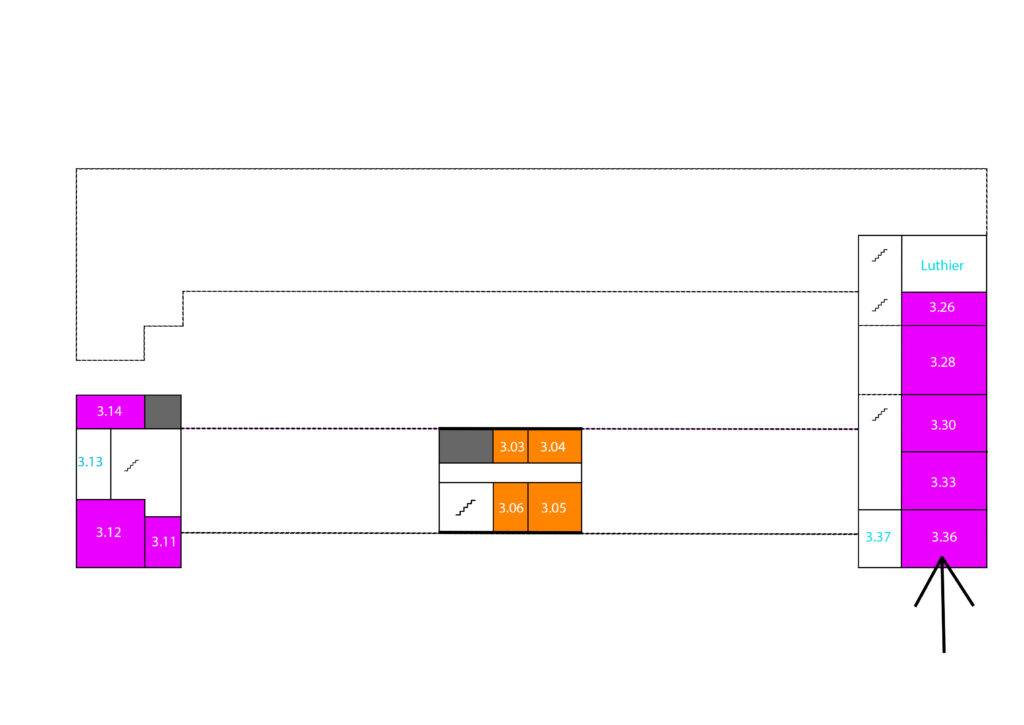
Permanent AV Facilities
1 x PA system with a rack mounted mixer, this comes with an aux in cable that can be plugged into the headphones output of a laptop or mobile phone. The mixer also has 2 microphone (XLR) inputs for use with additional equipment like audio interfaces and microphones.
1 x Large flat screen TV, which is fixed to an immovable unit. This has an HDMI lead to plug into a laptop and a remote control.
3.33
3.33 is located on the third floor of the West Wing at King Charles Court.
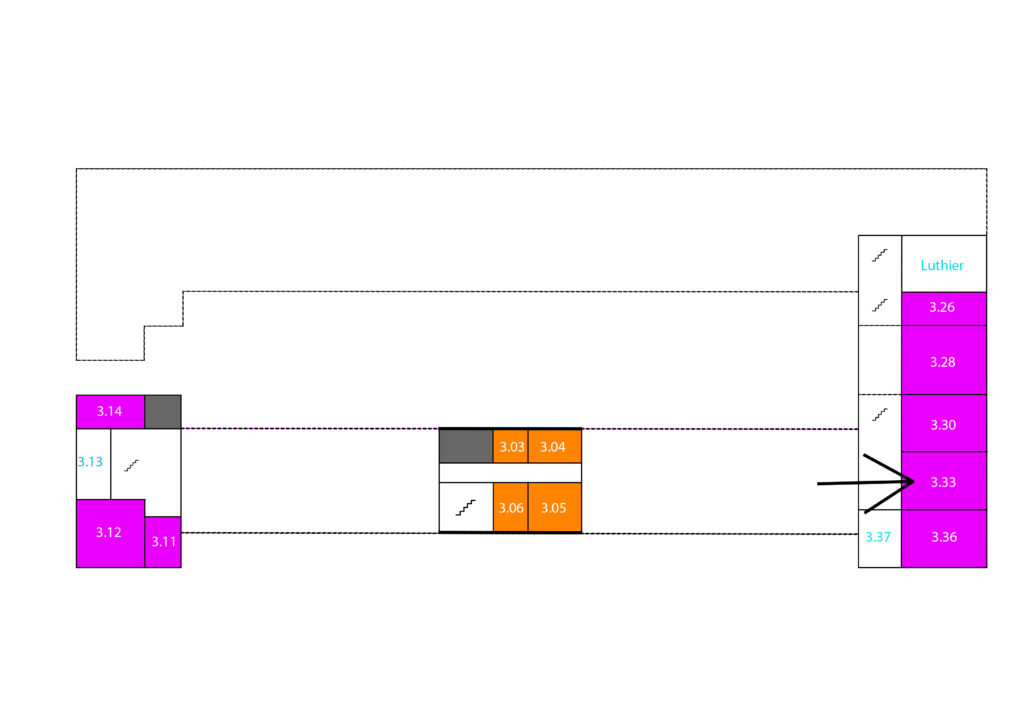
Permanent AV Facilities
1 x PA system with a rack mounted mixer, this comes with an aux in cable that can be plugged into the headphones output of a laptop or mobile phone. The mixer also has 2 microphone (XLR) inputs for use with additional equipment like audio interfaces and microphones.
1 x Large flat screen TV, which is fixed to an immovable unit. This has an HDMI lead to plug into a laptop and a remote control.
3.26
3.26 is located on the third floor of the West Wing at King Charles Court.
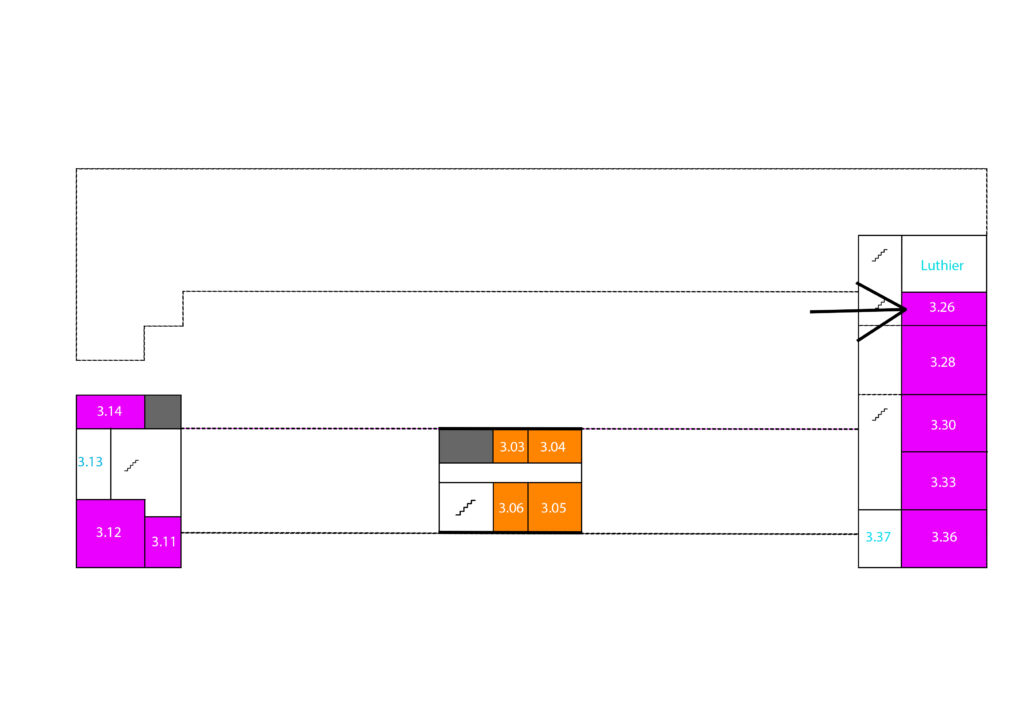
Permanent AV Facilities
1 x PA system with a rack mounted mixer, this comes with an aux in cable that can be plugged into the headphones output of a laptop or mobile phone. The mixer also has 2 microphone (XLR) inputs for use with additional equipment like audio interfaces and microphones.
1 x Large flat screen TV, which is fixed to an immovable unit. This has an HDMI lead to plug into a laptop and a remote control.
2.53
2.53 is located on the second floor of the West Wing at King Charles Court.
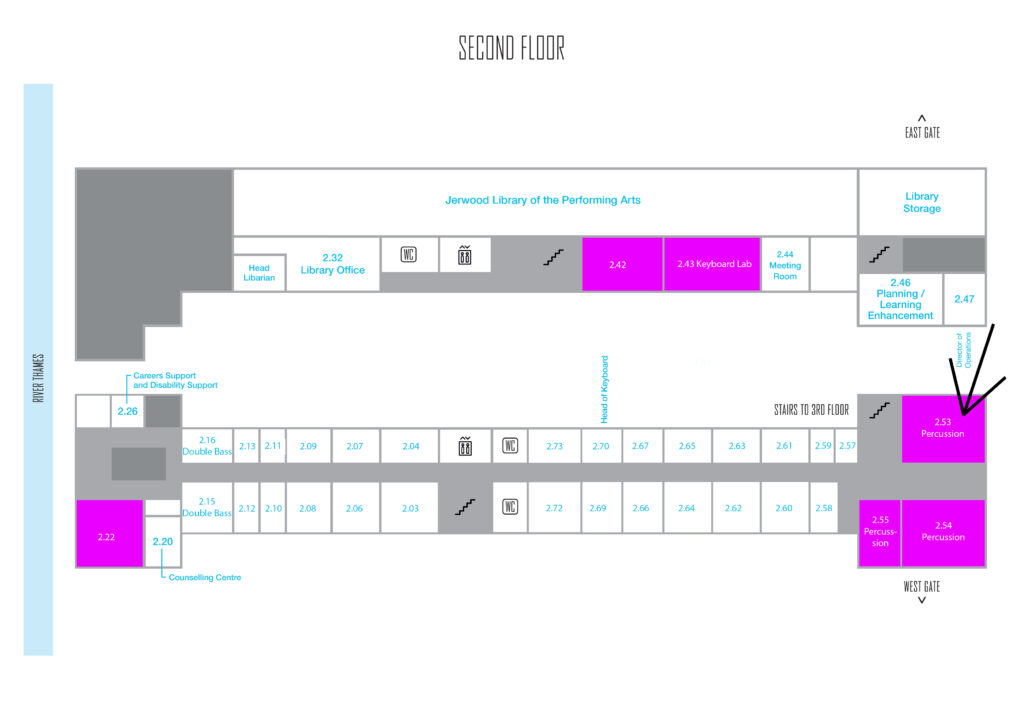
Permanent AV Facilities
1 x PA system with a powered mixer, this comes with an aux in cable that can be plugged into the headphones output of a laptop or mobile phone. The mixer also has 4 microphone (XLR) inputs for use with additional equipment like audio interfaces and microphones.
2.55
2.55 is located on the second floor of the West Wing at King Charles Court.
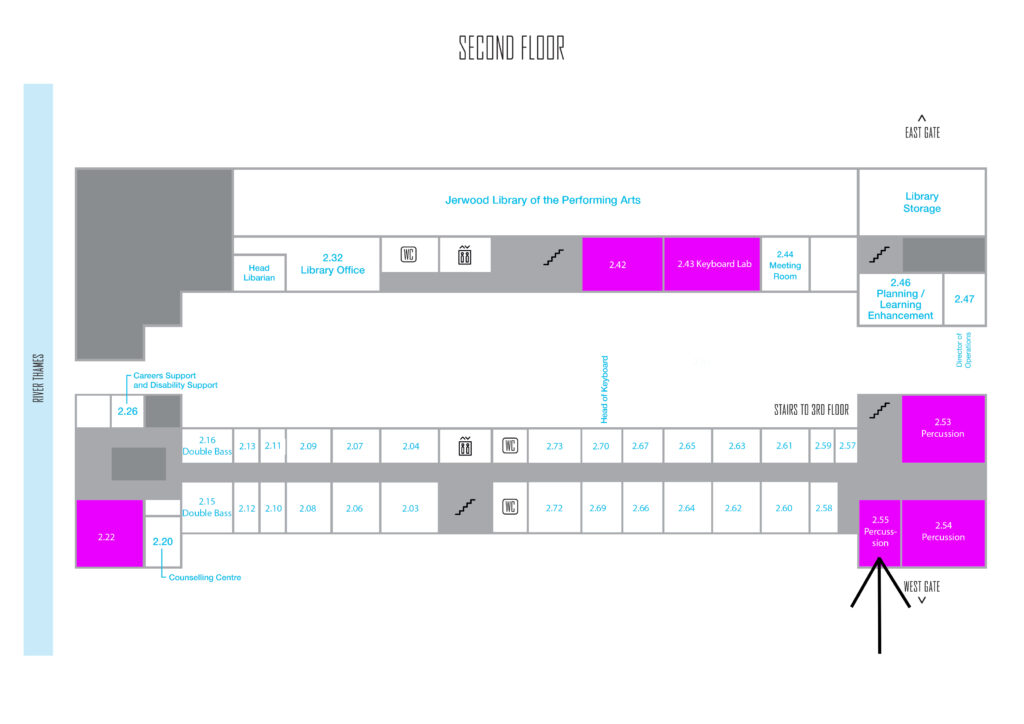
Permanent AV Facilities
1 x PA system with a rack mounted mixer, this comes with an aux in cable that can be plugged into the headphones output of a laptop or mobile phone. The mixer also has 2 microphone (XLR) inputs for use with additional equipment like audio interfaces and microphones.
G.12
G.12 is located on the ground floor of the West Wing at King Charles Court. It is accessible through Butlers Bar.
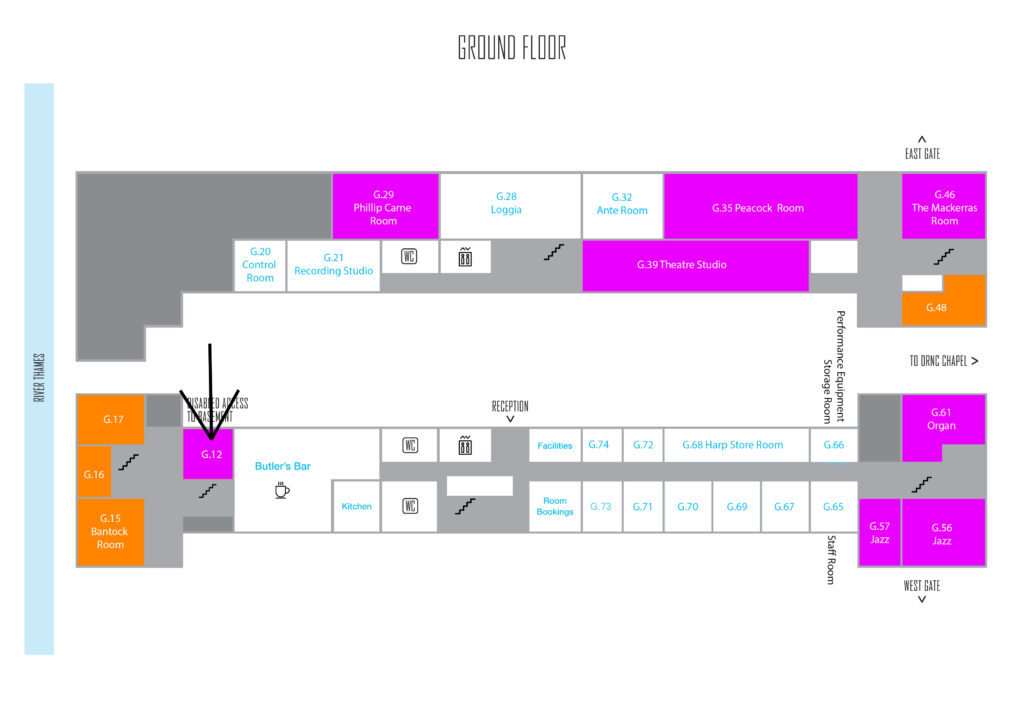
Permanent AV Facilities
1 x Large flat screen TV and a DVD player. This has an HDMI lead to plug into a laptop and a remote control.
G.61
G.61 is located on the ground floor of the West Wing at King Charles Court.
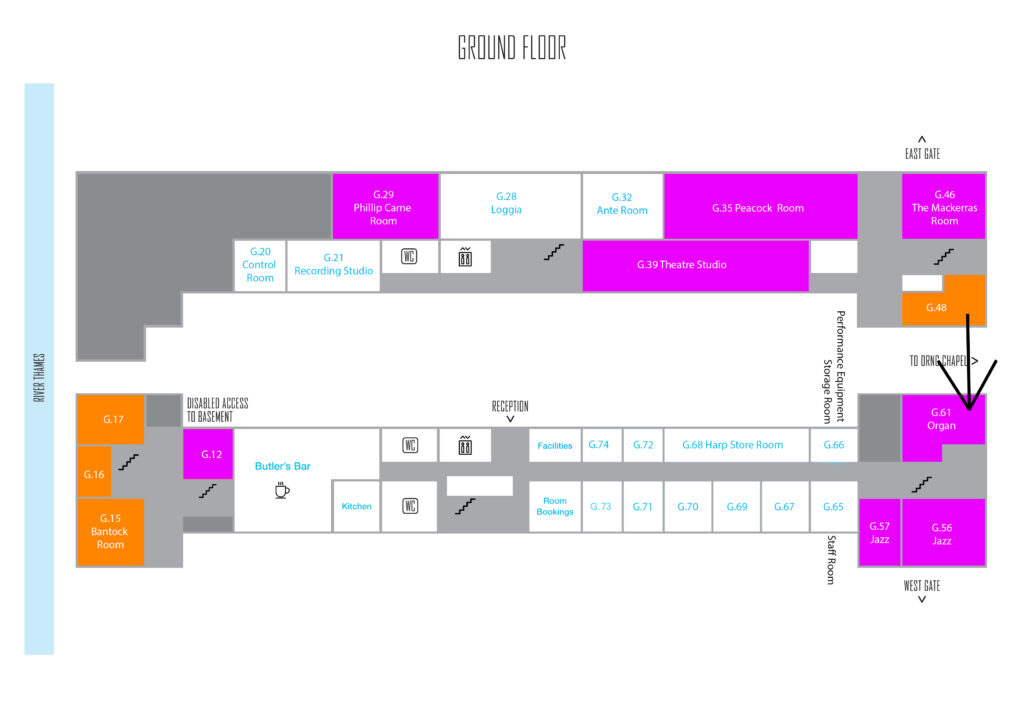
Permanent AV Facilities
1 x PA system with a rack mounted mixer, this comes with an aux in cable that can be plugged into the headphones output of a laptop or mobile phone. The mixer also has 2 microphone (XLR) inputs for use with additional equipment like audio interfaces and microphones.
1 x Large flat screen TV, which is fixed to an immovable unit. This has an HDMI lead to plug into a laptop and a remote control.
G.56
G.56 is located on the ground floor of the West Wing at King Charles Court.
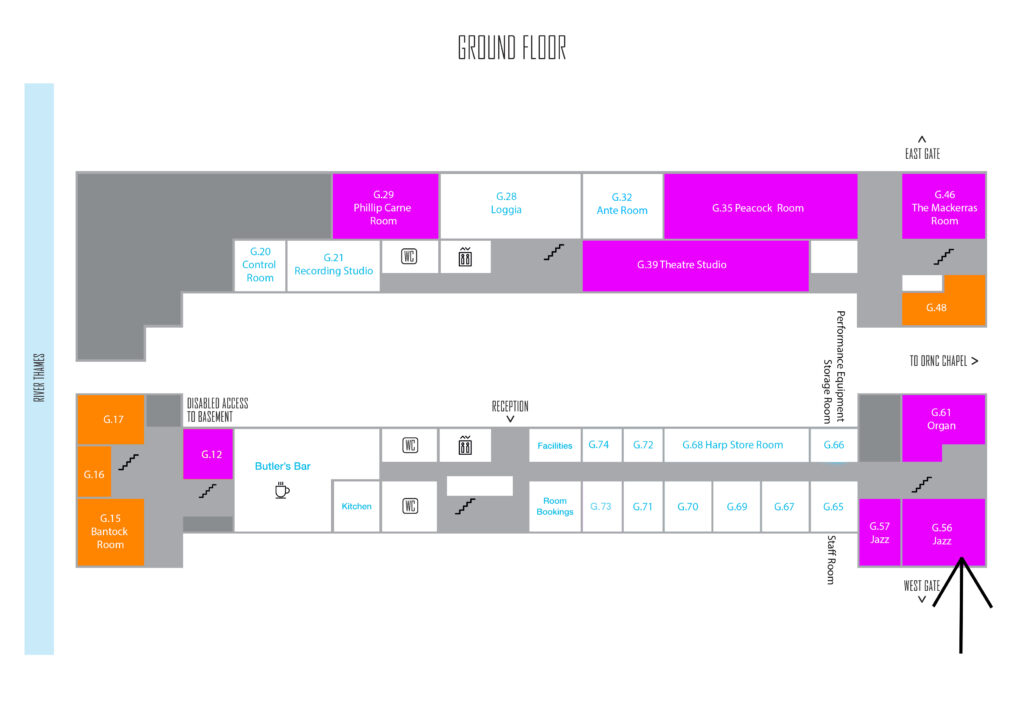
Permanent AV Facilities
1 x PA system with a rack mounted mixer, this comes with an aux in cable that can be plugged into the headphones output of a laptop or mobile phone. The mixer also has 8 microphone (XLR) inputs for use with additional equipment like audio interfaces and microphones.
To download the instruction manual for the mixing desk click on the link here – https://loudaudio.netx.net/api/file/asset/18479?sessionKey=H6hp88ql8fwuzSFgOuah4ytBO
1 x Large flat screen TV, which is fixed to a movable stand. This has an HDMI lead to plug into a laptop and a remote control.
2.42 (Piano Room)
The Piano Room (2.42) is located on the 2nd floor of the East Wing at King Charles Court.

It contains 12 electric pianos (plus 1 for the tutor). Each piano is a stand alone instrument and comes with a pair of headphones for each.
Information on the piano’s can be found here – https://uk.yamaha.com/en/products/musical_instruments/pianos/arius/ydp-165/index.html
There is also a large flat screen TV and a PA system installed. The TV has an HDMI lead for plugging into a laptop, the PA is for playback only and has an aux lead for connecting a laptop or other playback device. Both can be found attached to the tutors piano.
G.46 (Mackerras Room)
The Mackerras Room (G.46) is located on the ground floor of the East Wing at King Charles Court. It is accessible from the doors off of College Way, opposite the Painted Chapel.
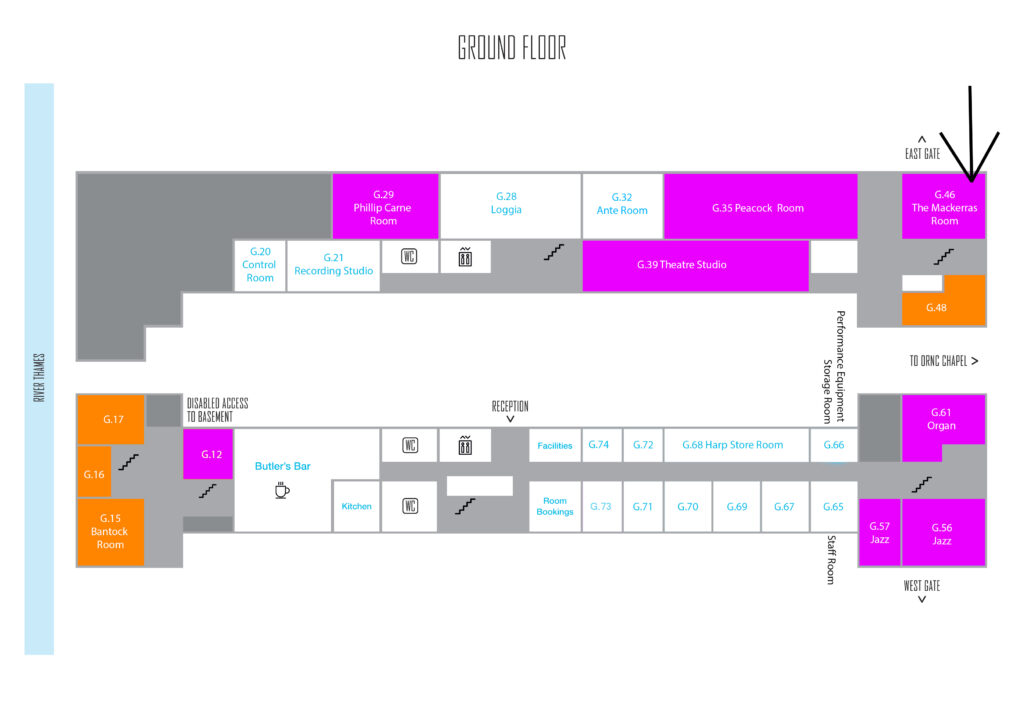
Permanent AV Facilities
1 x PA system with a rack mounted mixer, this comes with an aux in cable that can be plugged into the headphones output of a laptop or mobile phone. The mixer also has 2 microphone (XLR) inputs for use with additional equipment like audio interfaces and microphones.
1 x Large flat screen TV, which is fixed to an immovable unit. This has an HDMI lead to plug into a laptop and a remote control.
G.29 (Phillip Carne Room)
The Phillip Carne Room (G.29) is located on the ground floor of the East Wing at King Charles Court.
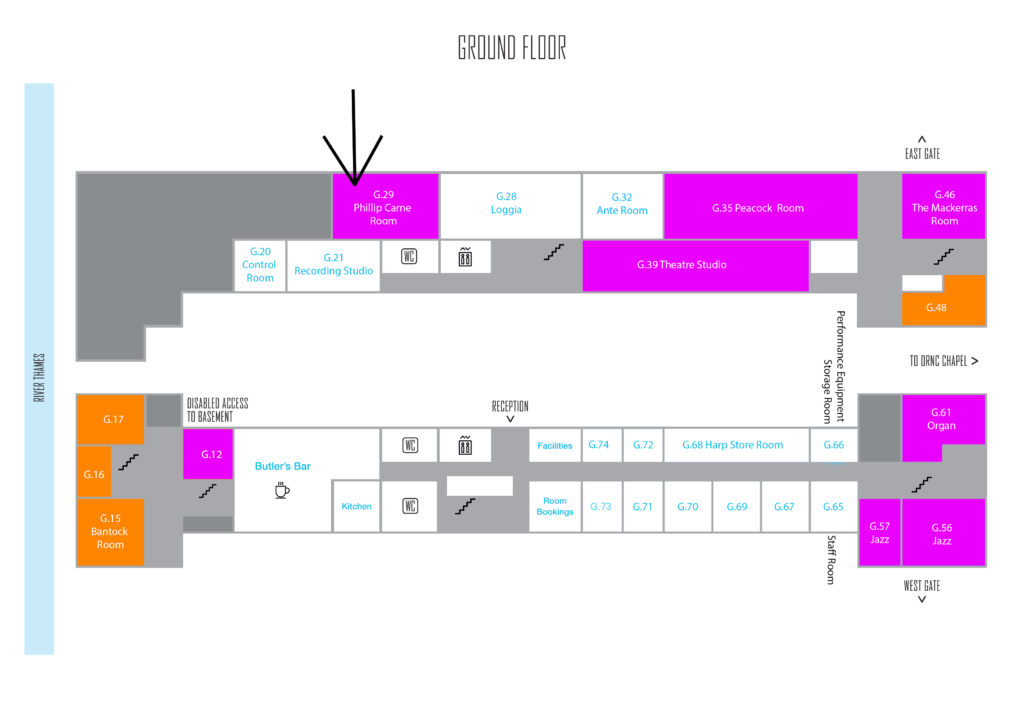
Permanent AV Facilities
1 x PA system with a rack mounted mixer, this comes with an aux in cable that can be plugged into the headphones output of a laptop or mobile phone. The mixer also has 2 microphone (XLR) inputs for use with additional equipment like audio interfaces and microphones.
1 x Large flat screen TV, which is fixed to an immovable unit. This has an HDMI lead to plug into a laptop and a remote control.
G.39 (Theatre Studio)
The Theatre Studio (G.39) is located on the ground floor of the East Wing at King Charles Court.
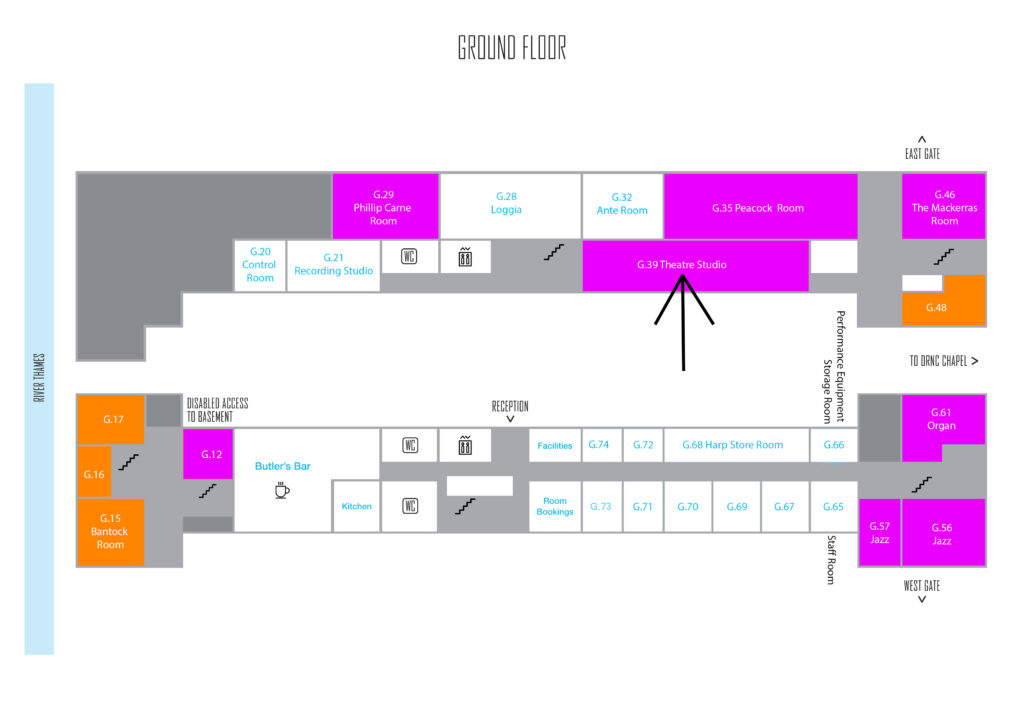
Permanent AV Facilities
1 x PA system with a mixing desk, this comes with an aux in cable that can be plugged into the headphones output of a laptop or mobile phone. The desk also has 8 microphone (XLR) inputs for use with additional equipment like audio interfaces and microphones.
To download the instruction manual for the mixing desk click on the link here – https://loudaudio.netx.net/api/file/asset/18479?sessionKey=H6hp88ql8fwuzSFgOuah4ytBO
Information on the PA system (HK Audio Polar 10) can be found here – https://hkaudio.com/products/polar/
1 x Large flat screen TV, which is fixed to a trolley with wheels. The comes with an extension lead so that it can be used in most parts of the room and an HDMI lead to plug into a laptop.
G.35 (Peacock Room)
The Peacock Room (G.35) is located on the ground floor of the East Wing at King Charles Court.

Permanent AV Facilities
1 x PA system with a built in mixing desk, this comes with an aux in cable that can be plugged into the headphones output of a laptop or mobile phone. The mixer has 4 microphone (XLR) inputs for use with additional equipment like audio interfaces and microphones.
More information on the PA system can be found here – https://www.rcf.it/en/products/product-detail/evox-jmix8#downloads
Laurie Grove
Laurie Grove has a number of flexible studio spaces, each with a variety of audio visual equipment installed.
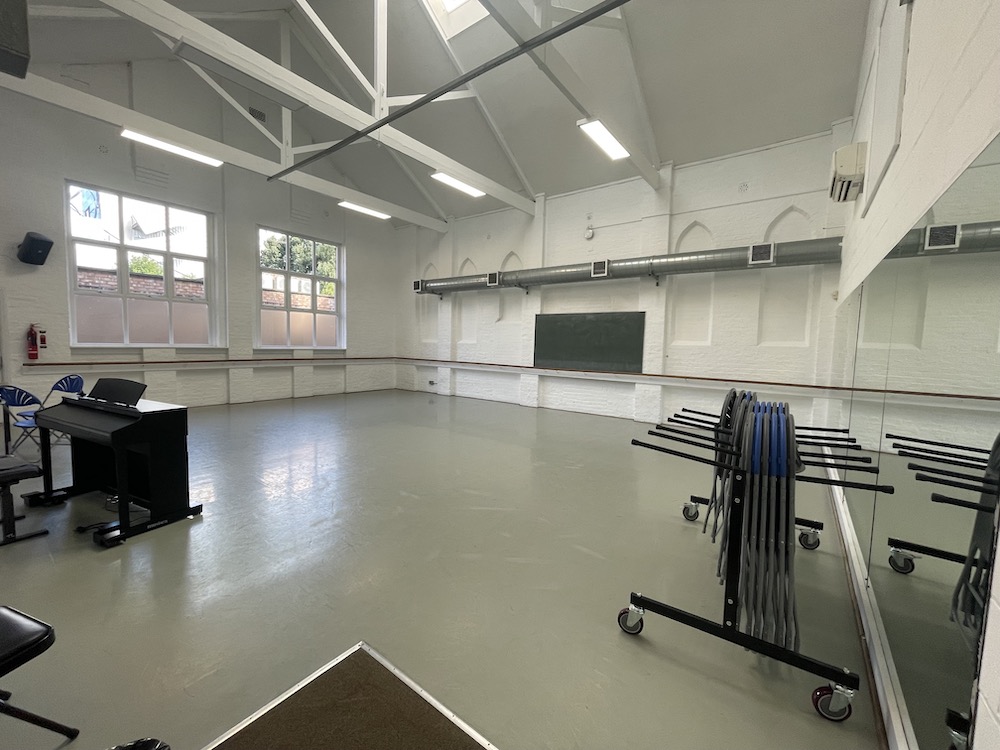
LG - Studio 1
Studio 1 is located on the ground floor of the Laurie Grove building.
Mirrored wall: Yes
Piano: Yes
Permanent AV facilities
1 x sound system attached to wall mounted speakers with CD player, iPod/laptop input cable and Bluetooth Rack Unit Receiver.
1 x 65 ” TV on wheeled mount, and HDMI input.
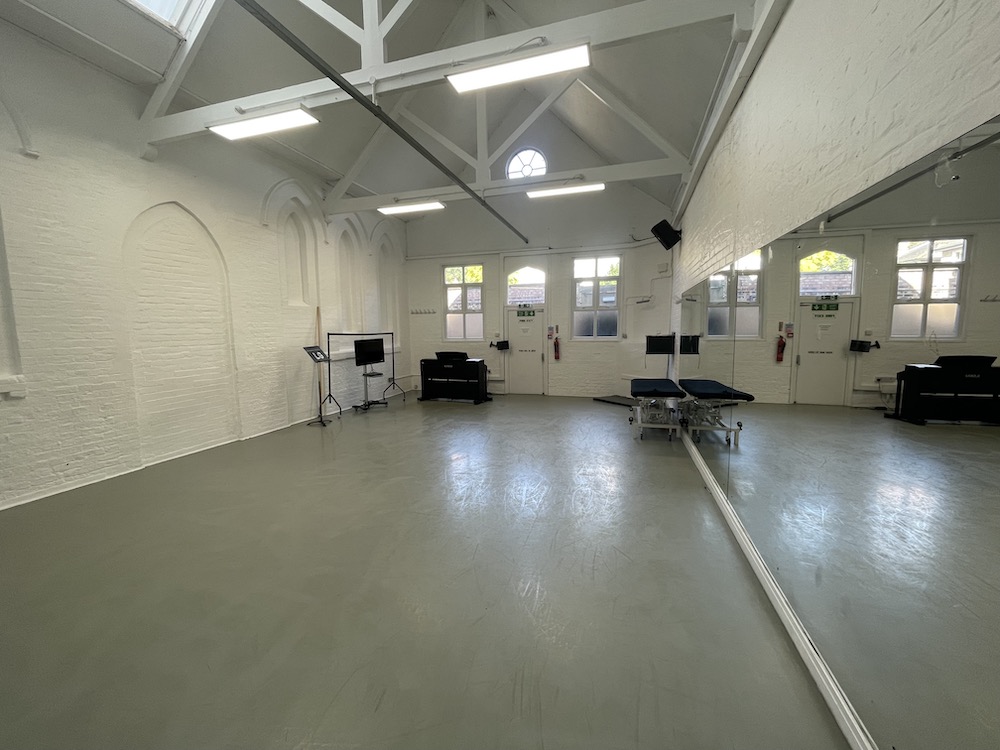
LG - Studio 2
Studio 2 is located on the ground floor of the Laurie Grove building.
Mirrored wall: Yes
Piano: Yes
Permanent AV facilities
1 x sound system attached to wall mounted speakers with CD player, Bluetooth Rack Unit Receiver and iPod/laptop input cable.
1 x TV on wheeled mount, with DVD Player and HDMI input.
LG - Studio 3
Studio 3 is located on the ground floor of the Laurie Grove building.
Mirrored wall: Yes
Piano: Yes
Permanent AV facilities
1 x sound system attached to wall mounted speakers with CD player, Bluetooth Rack Unit Receiver and iPod/laptop input cable.
1 x TV on wheeled mount, with DVD Player and HDMI input.
LG - Studio 4
Studio 4 is located on the ground floor of the Laurie Grove building.
Mirrored wall: No
Piano: Yes
Permanent AV facilities
1 x TV on wall mount, and HDMI input.
LG - Studio 5
Studio 5 is located on the 2nd floor of the Laurie Grove building.

Mirrored wall: Yes
Piano: Yes
Permanent AV facilities
1 x sound system attached to wall mounted speakers with CD player, Bluetooth Rack Unit Receiver and iPod/laptop input cable.
1 x TV on wheeled mount with DVD Player and HDMI input.
LG - Studio 6
Studio 6 is located on the 2nd floor of the Laurie Grove building.
Mirrored wall: Yes
Piano: Yes (X2)
Permanent AV facilities
1 x sound system attached to wall mounted speakers with CD player, Bluetooth Rack Unit Receiver and iPod/laptop input cable.
1 x 65″ TV on wheeled mount with HDMI input.
LG - Performance Lab 1
Performance Lab 1 is located on the ground floor of the Laurie Grove building.
Mirrored wall: No
Piano: Yes
Permanent AV facilities
1 x sound system attached to wall mounted speakers with CD player, Bluetooth Rack Unit Receiver and iPod/laptop input cable.
1 x TV on wheeled mount with HDMI input.
LG - Performance Lab 2
Performance Lab 2 is located on the ground floor of the Laurie Grove building.
Mirrored wall: Yes
Piano: Yes
Permanent AV facilities
1 x sound system attached to wall mounted speakers with CD player, Bluetooth Rack Unit Receiver and iPod/laptop input cable.
1 x TV on wheeled mount with HDMI input.